Cotswold Conservation Board Rural Skills Course – Lime Mortar for beginners.

21st and 22nd September. Another Cotswold Conservation Board lime mortars for beginners course, again held at the Ebworth Centre in the Cotswolds. By the efforts of another 6 wonderful students a little old one up one down stone cottage moved a little step along the road to recovery. We still have a way to go with much pointing and stone repair remaining to be done, whilst inside we are very close to having all the plastering close to completion.

Notes to the course:

Lime mortar mixes…………1 part lime putty to 2.5 parts sand ( however the sand was actually a mix of half sharp Cotswold sand and half Cotswold stone dust)

for some of the stone repair inside I made a mix of loam and quicklime to make an earth mortar similar in strength and character to the mortar used in the house construction.

The interior plastering that is being repaired is rather thin; it being a pretty low status building, however it is worth saving whats possible.

One beauty of lime is its versatility; the same mix being used for the pointing was being used for the plastering.

The pointing was pretty technical and, to be honest was more to do with stone repair and tile stitching than pointing but we did get a little straight forward pointing done.

The main points to remember in pointing as in all lime work is the timing; after the mortar has been troweled into place there is a period of waiting whilst it firms up enough to be tidied up, this will usually involve pressing in the pointing to compact it, which increases its strength and closes up any shrinkage cracks that often form, after this compaction it is normal practice to brush the surface to reveal the aggregate – avoiding any brush marks.

Of course, we had to mention hydraulic lime, and we used a bit of Breckweg NHL2 mixed with the same blended sand/stonedust at the same proportions as above.

I know some folks are turning away from hydraulic limes (and some have never been users) but its out there and can’t be ignored, I have been using this Breckweg NHL2 for a few weeks and I am fairly impressed – its initial set is not too rapid and its final set doesn’t appear to be too hard – although some might have other ideas – we all disagree a lot of the time!

(I added a bit of confusion after having been mixing lime putty and sand together by suddenly springing on the group some ready mixed mortar, after some explanation I think I managed to convince them it was just the same as what we had been mixing ourselves.)

ebworth ebworth inside

Posted in Training courses | Leave a comment

Rendered DNA

During the spring I began the creation of a Modern modelled render – not pargetting, but neither strictly sgraffito. In actual fact not modelled at all but carved into the surface of the KRend render (a pity it wasn’t lime render)  which had been applied by another contractor (sadly) It was applied to straw bales held within a modular cassette based superstructure forming the walls of a science block built for a girls School in Bath.

A complete tangential detour from the repair and conservation of old buildings and their lime surfaces which I am known for within the Cotswold area.

The design was visualised by architects, White Design of Bristol and built by Modcell

I was asked to devise the methodology and bring about the realisation. The plan was to depict a DNA double helix spiralling horizontally the full 7 metres x 45 metres of the front and side elevations.

The pattern itself was transferred from 20 architects drawings each showing about a 3.5 x 3.5 metre square section .

Due to the client requiring to see a trial section modelled onto the actual render we chose one of the more complex pieces which happened to be part way along the elevation – at this stage the client could still cancel the project so there was a possibility that the rejected trial would have to be re-rendered.

However on the strength of the test panel the scheme was accepted. Of course, we had not started in a logical place so the pattern had to spread out either side of our starting point. I wanted to draw the entire DNA before cutting but one section had been cut already so there was some trepidation as to weather the pattern would indeed connect together; whether the diagonal ribbons were at the exact angle for the crossing points to be in the correct places and so on.

 There was, however, no need to worry as our marking out had been accurate enough for the pattern to be continued and developed along the building without any adjustment or correction.

 I had decided that the pattern needed to be carved in low relief as any applied pattern would be at risk of being knocked off the render if someone rubbed against it, also there are many areas within the render which would have tended to catch water. The pattern had to be shown as being 3 dimensional because the DNA twists around an axis and has a radius in this case of 3.5 metres and although the pattern does not accommodate any perspective it still needed to show the ribbons crossing each other. There was not much depth of render available but only a 1mm step between the 3 planes were required for the effective 3D depiction, thereby requiring a maximum depth of 4mm to be carved.

 After marking out the pattern it was colour coded with chalk so we knew exactly the depths each part would be carved to.

 Foreground ribbon 2mm

Middle ground base pairs and hydrogen bonds 3mm

Background ribbon 4mm

Once colour coded, the pattern was carved with hand tools. When the whole scheme had been carved the cut surfaces were rendered smooth and the edges sharpened using a lime putty fine stuff. This finishing plaster created a smooth surface which contrasts with the open texture of the scoured render and thereby allows the pattern to be clearly seen. 


Posted in decorated plaster, Lime Plaster, technical stuff, Uncategorized | Tagged , , , , | Leave a comment

Cotswolds Conservation Board Lime Mortar Course

Held on the 1st and 2nd of September at The National Trusts Ebworth Centre and conducted by myself. …….. and this is the site:  A derelict stone cottage circa 18th century.

The course was organised by the Cotswold Conservation Board and had 6 participants who worked hard to begin the careful and considered repair of the home sweet home of some long retired gardener.

My introduction covered the use of Lime Mortars in historic building construction – this was a beginners course spread over a weekend and so I kept it reasonably simple and so really only talked about the use of lime mortars in the repair of stone cottages.

The cottages in the Cotswolds, and in many other places are not actually built with lime mortar but with mud mortars or sometimes stonedust, or quarry mud, as I call it. I have also seen coal ash used especially with bricks.

The lime is reserved for the pointing, rendering, the limewash and the interior plastering, and even then the first coats of plaster were often mud.

However this was a lime course so I introduced the ubiquitous  Lime putty and I explained the Lime Cycle  :

Limestone: Calcium carbonate ( Caco3 )

Burn in a kiln

To drive off Carbon Dioxide ( CO2  )

To create:

Quicklime:  Calcium oxide ( CaO )

This strongly Reacting with water produces:

Calcium hydroxide ( Ca [OH ]2 )

If this is allowed to dry slowly it absorbs:

Carbon Dioxide ( CO2  )

And thus returns to:

Calcium carbonate ( Caco3 )

Though not quite limestone almost, and therefore compatible with  stone, mud and wood.

Then we looked at sands. Sharp sands 3mm down to dust. Also crushed Cotswold stone (looks a bit like the sand but dustier and more absorbent) explaining that individual preferences amongst professionals accounts for some using sand and some using stone dust, also, of course sand is more readily available than stone dust to most people. We mixed both sand and stone dust together in roughly equal parts and mixed two and a half portions of sand with one part lime putty by volume.

One thing to remember – this is all approximate because sands vary in surface area and its the surface area that determines the amount of lime required to make a workable mortar. Also lime putty is partly water so again you may have to add more of your lime putty (for arguments sake) than my lime putty to get the same lime in there. As I say it’s approximate. what you are looking for is a nice to use workable mortar – nice and ‘plastic’ so it stays on the trowel but not so much lime that it has a tendency to crack as it dries. But if you are using lime putty too much lime is always always preferable to too little.

The Consistency of the mix is important in that it has to vary depending on whether one is pointing or plastering or roughcasting (Harling).

I mentioned NHL5 NHL3.5 and NHL2. These numbers refer to the hardness achieved at 28 days 5 being the hardest, however each brand, and there are many, differs from the rest and the criteria for being in one of the brackets is so broad its almost meaningless. However if you stick with NHL2 you should be fine and I favour St Astier and Singleton Birch who produce an NHL1

http://www.singletonbirch.co.uk/index.php/natural-hydraulic-lime-brands

http://www.stastier.co.uk/restoration-conservation.htm

We used NHL2 mixed 2.5 sand to 1 lime and mixed that 1 to 1 with our lime putty plaster for pointing the front of the cottage.

As an aside to pointing the cottage we made up a lath panel so that we could see some lath and plaster and although it did not set during the weekend to allow it to be finished in any way we were able to see how the plaster squeezes through the laths. We used riven oak laths, of course they are not straight and so the spacing between the laths are not even, so the rivets of plaster are not even either. I think that sawn laths are better for ceilings because you get a much more even gap allowing the optimium amount of plaster to be used which, in turn, gives a lighter ceiling thereby negating the need for the stronger riven laths. Of course on external lath and plaster walls the oak is much better than the soft wood sawn laths.

I calculate that on average you need 9 laths per vertical foot or if you like 27 per vertical metre. so if you buy you laths 3 foot wide, which is normal, you will need about 27 laths per yard (or metre). you always need a few extra so assume 30 and you should be about right. And its my preference to staple them up with a Paslode stapler.however on this occasion we nailed them on with galvanized clout nails.

There was a lot of missing stones and lost surfaces so as well as the pointing we undertook some tile repairs: filling the missing facing with miniature walls of stone roofing tiles cut to size and bedded in lime mortar – a standard procedure often used on historic fabric to denote repairs from original masonry but useful as a way of securely filling in awkward gaps where removing more of the ‘root’ of the stone would do more damage than good.

We had to replace some old stones in order to rebuild the wall under the window where there is a window seat and therefore a thin wall. The stones were bedded on mud mortar because all the other stones in the wall are themselves bedded on mud mortar and by bedding the new ones on similar stuff any subsequent movement will be even through the new and old masonry. It was pointed with lime as the rest of the wall was.

Some internal patch plastering with haired course stuff (1 lime putty : 2.5 sand plenty horse hair) finished with fine stuff ( 1 lime putty and ½ silver sand ) and finished  off with a very thin smear of lime putty brushed flat with a wet 4” wall brush.

I demonstrated making up limewash with lime putty and water mixing it to a thin cream/thick milk consistency into which I sieved yellow ochre mixed with water and then  raw umber mixed with water to tone down the yellow. You shouldn’t add the pigment direct to the limewash as a powder as it wont mix in properly.

Quantities of pigment vary but the limewash dries a lot lighter than it is when it’s wet so you may need more than you think.

I also showed how to trowel round and square corners, always starting on the corner and trowelling away.

Though I did some demonstrations it was a practical course and all the hard working participants did a great job launching what I hope will be a successful series of practical workshops in this abandoned little 1up 1 down Cotswold cottage in a picturesque setting in the heart of the Cotswolds.

The Gardeners Cottage Rescue Group

Posted in technical stuff, Training courses | Tagged , , | 2 Comments

A summary of limewashing a house

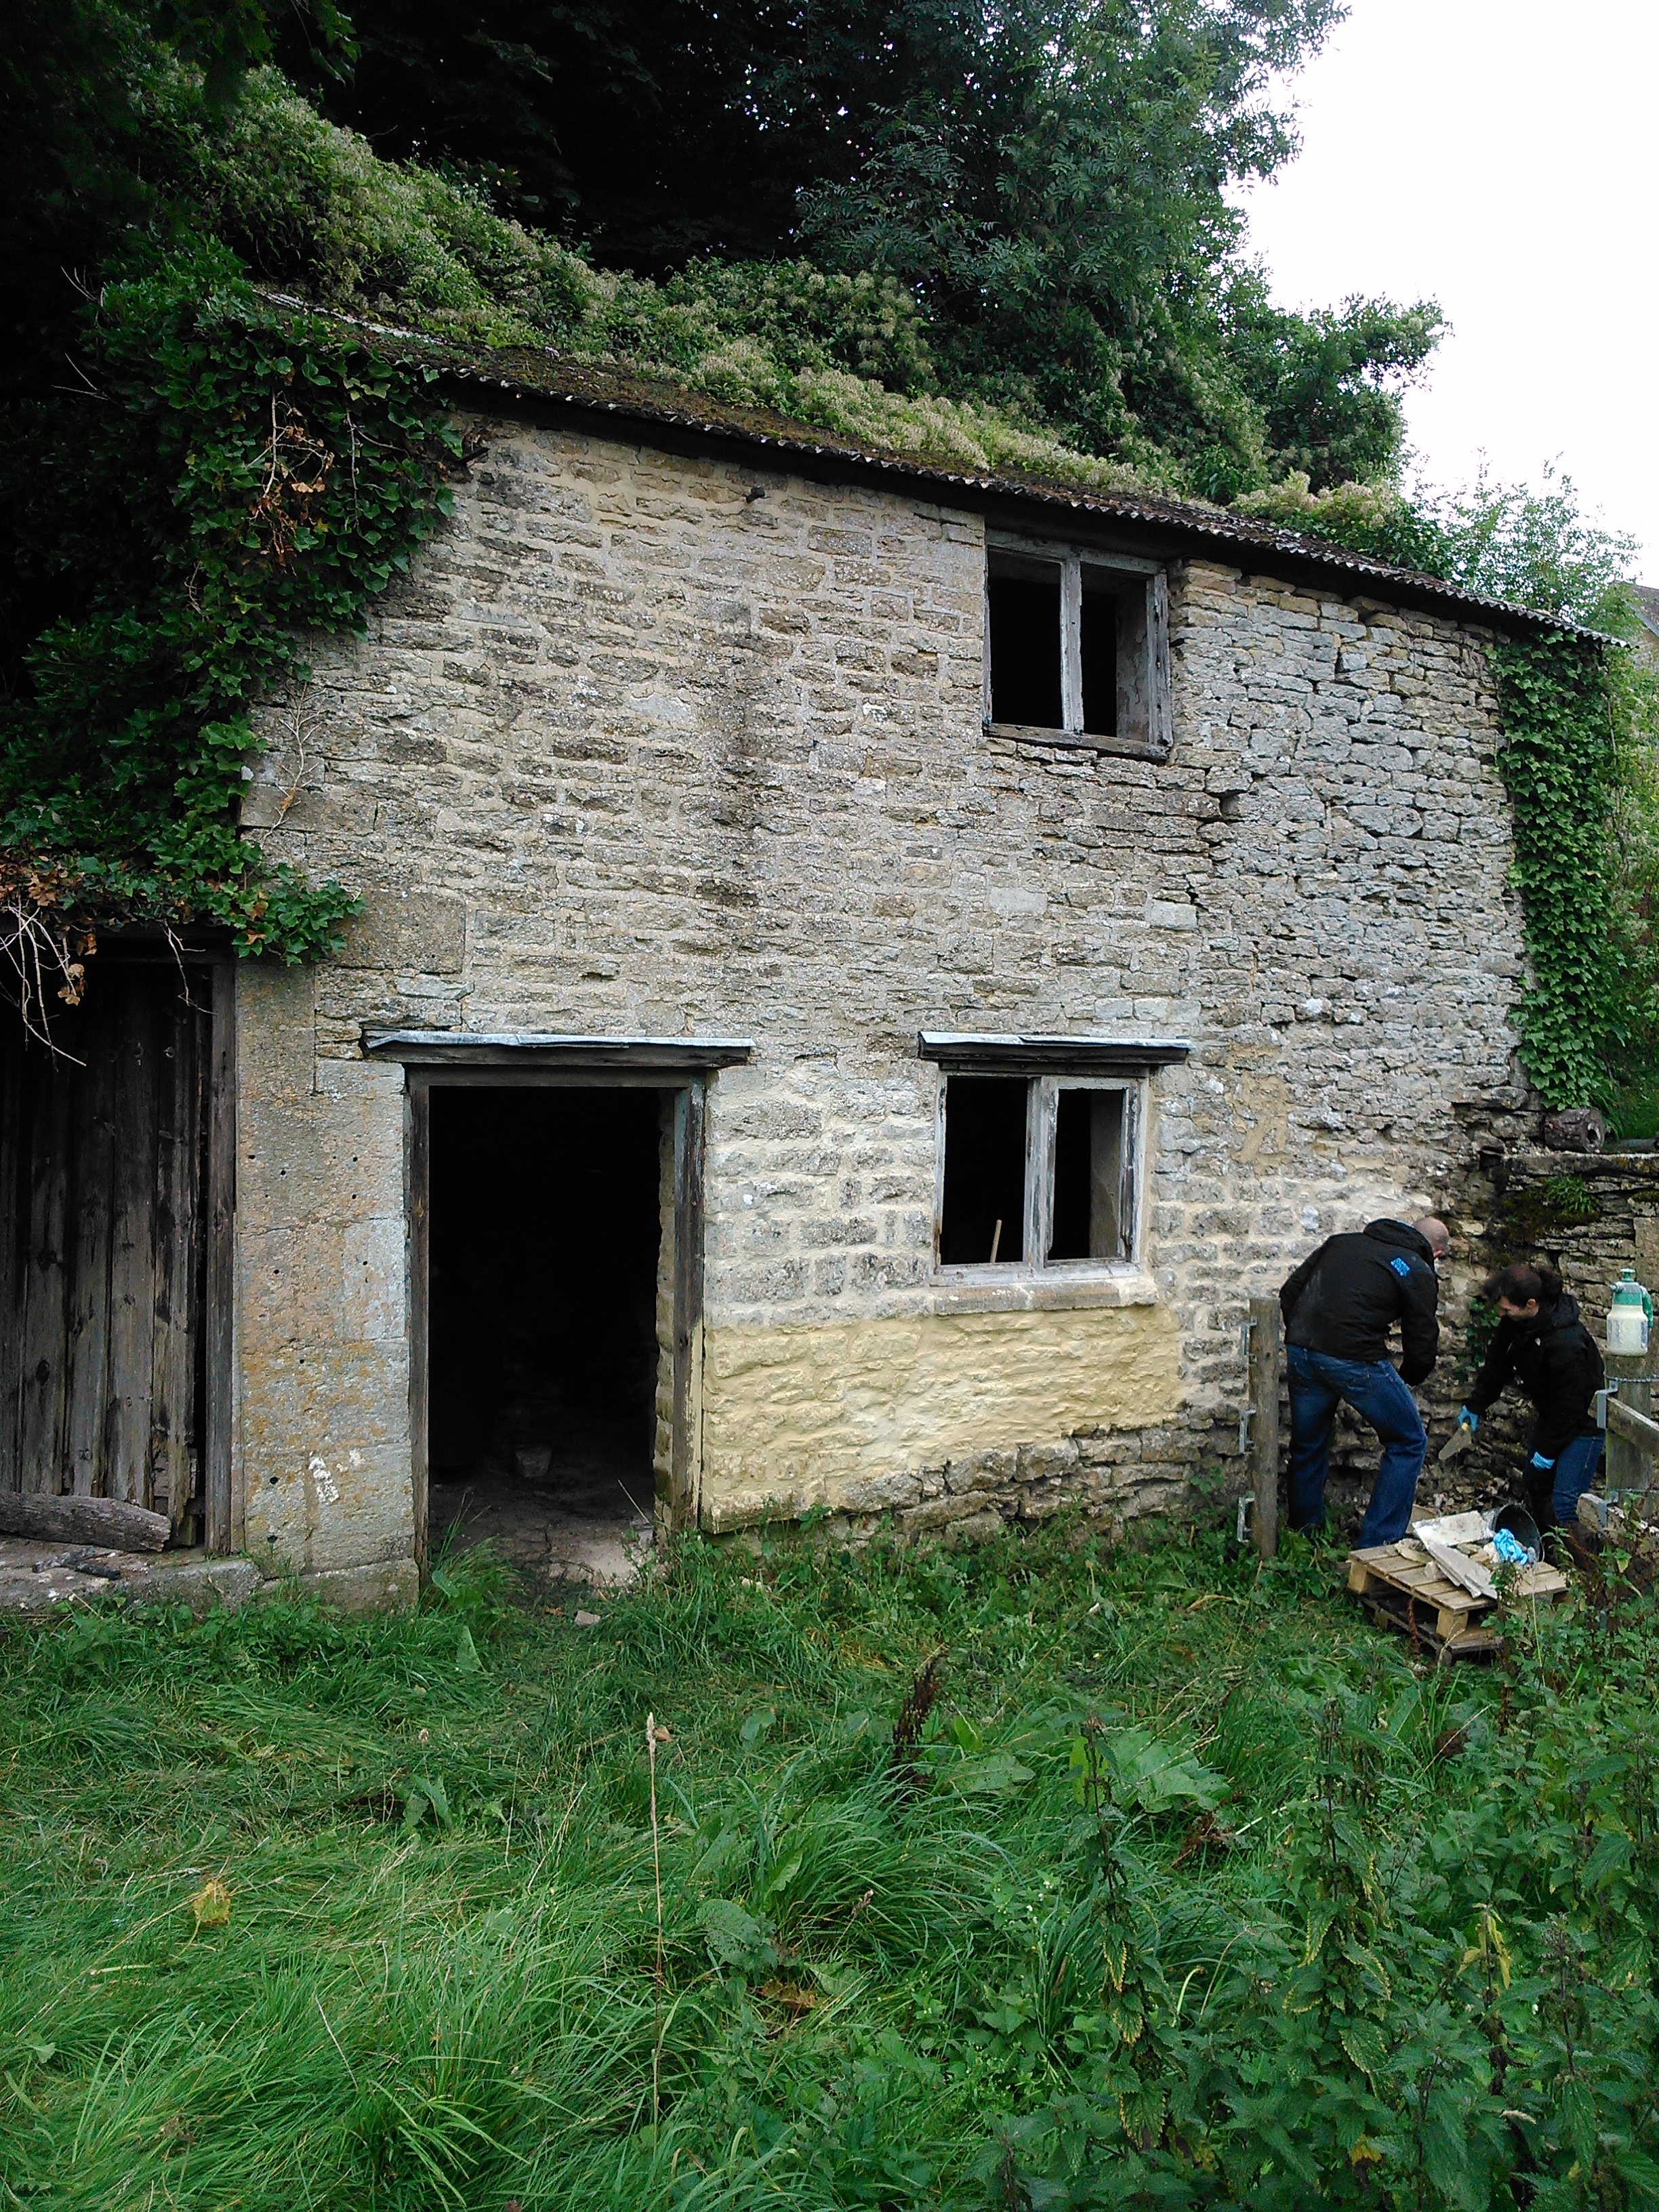
As with many render repair projects the main difficulty was the removal of the lichen and grime, unless this is done thoroughly then the limewash will not adhere satisfactorily, therefore the first task was to power wash the render and then wire brush and scrape off any remaining stubborn areas of lichen – even then some deep rooted patches of lichen still remained embedded in the open texture of the weathered troweled surface.

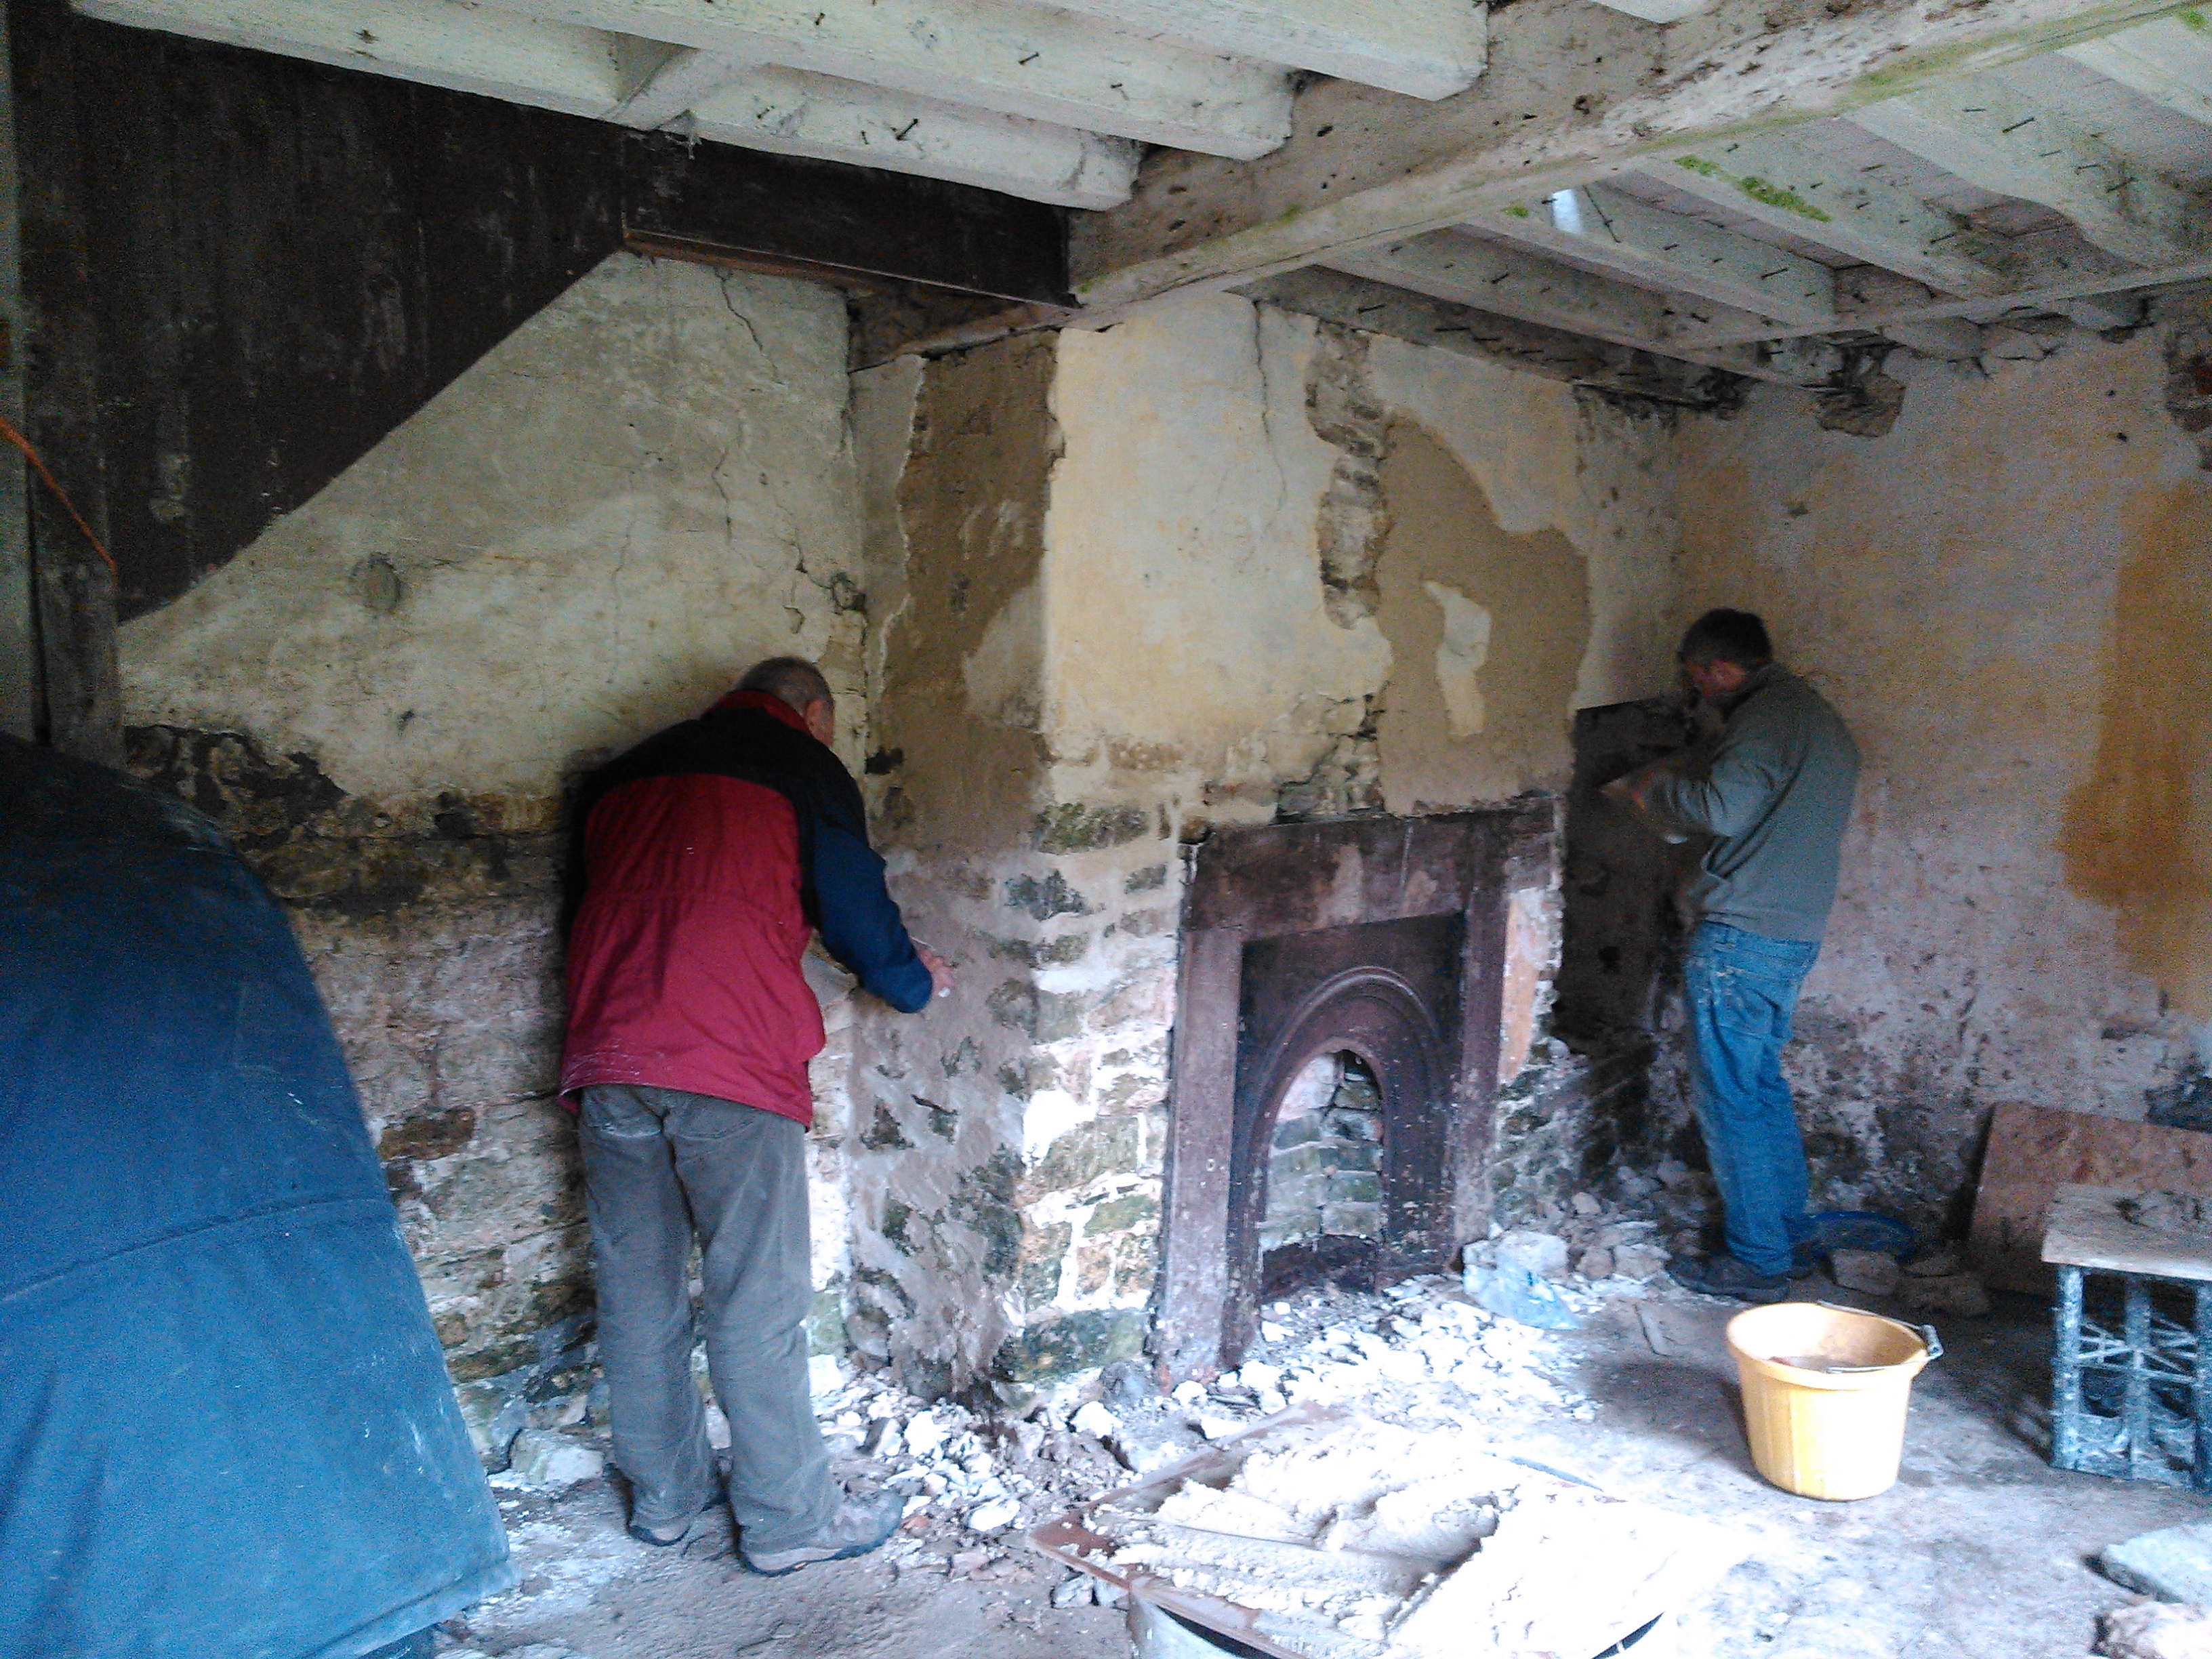
The render had been patched here and there with cement mortars of varying ages, the patches were in the usual places: gables, the dormer and above some windows;  places were the masonry had settled over the years or where the earlier lath and plaster had been replaced with cement on wire mesh or simply on to the existing old wooden laths. These areas of cement were removed and what lay beneath replaced or repaired.

Although it is easy to spot the cement patches that have to be removed it is less so when it comes to loose areas of the main render. It is not until the scaffold is up and the work has begun that the full extent of the re-rendering that will need to be carried out. In this case we lost about 12 square metres. The lime render was between 30 and 50% thicker than many renders that I have come across, and with no animal hair present as reinforcement it was unsurprising that some was lost.

The render appeared plane flat, but on closer inspection it could be seen that it had once been ruled out like ashlar and at a later date skimmed over thereby obliterating the ruled lines, there were a number of areas were this skimming coat had or did peel off. In addition to this loss of surface there were also hundreds of  nail holes and indeed nails – which when removed obviously left more holes.

After the cleaning of the render and removal of damaged or unwanted render the re- rendering began. The unexpected thickness of the render used quite a bit more material than usual and, of course, more time, but with plenty work still to do time could be made up.

(In these instances of over thick areas of render I always seek to take up some of the space, and save time, by using broken clay tiles or plant pots or even plain stone roofing tile offcuts to create a mosaic of ’tiling’ between coats. This creates a stronger coat of mortar – thicker than would be achievable with just plain mortar – whilst at the same time reducing the time required between coats.)

The important thing is to bring the new surfaces level and try to leave them as unobtrusive as possible, which can be quite an art when the surface all around has had a few decades to weather to its own unique texture and appearance.

Hydraulic lime was used for the binder, this time a Portuguese brand called Secil, rated NHL3.5. it was mixed at 2.5 parts sharp sand (3mm down) to 1 part lime. Our mortar was reinforced with horse hair although the strength of the lime probably negates the need for this. Still its good practice.

Between coats of render a coat of whitewash was applied on the remaining undamaged render, this has three benefits:

It highlights all the nails holes

It reveals any stubborn lichen remains

It results in an extra coat of limewash on the historic parts of the render.

(and it encourages a close inspection of the render as you go along with the brush, which in this case did indeed reveal further areas weakness.)

Going back to the render, laths were applied to the dormer window and verge rafters, however due to settlement and movement of both the roof and the gables there wasn’t actually room in some places for laths on the verge rafters and so mesh was used. Not metal lath, which I despise, but second hand nylon fishing net last used on a fishing boat in Scotland I think, its easy to cut and fit, is strong and is very compatible with the lime mortar.

Once the rendering was complete, the nail holes were filled, hundreds of them but all easily seen as black dots on a nice white background. Also now noticeable were the areas of missed lichen and grime that were already shedding the lime wash. Further wire brushing and scraping on these areas left them better prepared.

With the elevation now prepared for limewashing, we were able to proceed, a colour had been narrowed down to something in the pink category but quite what shade had not been decided  – in this situation the best way is to get some limewash on the building, stand back and evaluate it – at this stage, with four coats still to be applied, there is plenty opportunity to get the colour shade correct.

The white ‘undercoat’ makes it much easier to see were you have and haven’t painted, ensuring that the first two coats have been thoroughly applied over every single millimeter of render is important for the eventual result, it is almost inevitable that patches will get missed when the same colour is applied again. Which is why adjusting the colour is in itself a good thing, It is best to go a bit darker each time but if you have to go lighter a couple of coats will obliterate what has been rejected as long as the difference isn’t too great. It just means you might have to apply an extra coat.

Each of the four coats was applied with a brush after dampening the wall. The coats were allowed to dry for 24 hrs before the next coat.

The limewash used is an improved product using a reinforcing agent, this is still under research and development but in trials over three years has proved very beneficial to the end result.

With the colour and tone adjusted between coats a final colour was chosen and a large enough batch of wash was prepared to complete one coat. The coverage was in the region of 6 square metres per litre per coat.

The limewash was made from well  matured lime putty  – not hydraulic lime which I believe makes an inferior limewash as it settles out of the water and therefore requires constant stirring in the bucket.

My philosophy  during the project was to repair the render and rendered surface but not to attempt to restore it to any pristine condition but to produce a sound render, looking well maintained but with plenty signs of age.

pigments used:

yellow ochre, marigold, raw umber. ( in order of quantity)

Posted in limewash, technical stuff | 5 Comments

looking at mortar mixes

Determining mortar mix ratios visibly.

Imagine four snooker balls arranged in a pyramid, 3 on the bottom one on top.

There is a small pyramid like gap in the middle of this arrangement. The volume of this gap can be arrived at by some simple geometry – find the volume of the spheres, the volume of a pyramid with sides equal to the distance between the centres of the spheres and subtract the volume of the parts of the spheres that are in this theoretical pyramid. The gap is the bit in the pyramid that the spheres do not occupy. This can be expressed as a percentage or ratio of the total volume of the spheres. Move the spheres apart and this ratio changes. At 2.5 : 1 the spheres are at an optimum distance apart so that the gap between the  four snooker balls is as even as it can be.

Repeating the pattern of four balls to create say a room full of snooker balls with this spacing maintained will result in a matrix of space within the balls that is as consistent in thickness as it can be, fill this with a binder like calcium hydroxide and you achieve a mortar that is a compromise between strength and economical use of binder. Increase the lime and the tendency to shrink is increased.

Of course we don’t use snooker balls, and we don’t like sands that are uniform in shape or size. But the same pattern can be used in my model by reducing the size of the balls, so lets introduce some marbles arranged in the same way and some footballs as well and we see that the matrix is maintained but the now groups of spheres can fit in that gap between the four balls we first mentioned. This then creates an even more regular matrix and thereby reduces further the tendency to shrink.

The finer the sand, as we all know, the greater the shrinkage, this is because there is less opportunity for there to be groups of sand grains between other larger grains – all the grains of sand are much closer in size.

By using geometry it is shown that two and a half parts sand to 1 part calcium hydroxide makes a good mix for course stuff.

A visual inspection of a section of mortar, therefore, can be used to determine the probable mix ratio of the mortar simply by measuring the distance between the grains of aggregate.

Q. Why does fine sand require more lime?

A. Because the surface area is greater.

This can be easily illustrated by a box of OXO cubes. If you paint the box you will need x amount of paint. If you paint all the OXO cubes as well you will need more paint!

Therefore the smaller the sand grains the more lime is required. Now if we return to the snooker balls that I mentioned at the start and imagine they represent say silver sand or, in fact, finishing plaster (fine stuff). It is known that there is a concentration of lime at the gap between the four balls. But, whereas, I introduced smaller and larger balls to inhabit each others ‘gaps’ now I can’t. This now introduces a possibility of shrinkage occurring – as the water in the lime evaporates the binder shrinks and pulls groups of grains apart creating cracks in the plaster. It is interesting to ponder why the cracks occur just where they do, is it random or the result of a weakness of some sort within the plaster?

By using very thin coats and floating or scouring the surface of the plaster we reduce the incidence of cracking.

But why does any of this matter? Well, by understanding why we use say 3 to 1 we can make adjustments to suit the situation, understand failures, and create mortars that are targeted at the job in hand.

Posted in technical stuff | Leave a comment

Pieces of Art

Following on from Stacks of Fun here is Pieces of Art. The elephant is my first attempt at lost wax casting – it was meant to be in bronze but my crucible broke so I made the best of a bad job and, with a make shift crucible cast it in lead. I made a lot of mistakes but I got something from it. Recently, a friend applied a bit of gilding. Its 80 mm high.

The paintings are oil on board.  The tunneler is 330 x 400 mm. A small flower is 460 x 560 mm and The gesture is  180 x 250 mm.

The painting was a bit of a phase, I thought I would have a go one day and produced these over a 4 month period.  I have a few more, some still unfinished, and I have a few ideas I would love to get going on but there just isn’t time at the moment.

Its not really work but maybe one day?

Posted in just having fun | 1 Comment

Limewash thoughts

I was asked if the roughcast render I was doing could be self coloured to avoid limewashing.

This is a misunderstanding of the role of limewash especially where roughcast renders are concerned.

Limewash is not actually a paint – it is a brush applied  render, applied very thinly in a minimum of three coats.  It renders the render. I.E renders the render more weather resistant.

The colour is a bonus.

I like to take the limewash over the stone elements, this is to seal the interface between render and stone, however, this upsets the builders on new build projects!

The colour of a limewash imparts to the building a tremendous visual impact – it glows in the midday sun and  picks up the sunset hues.

The predominant colour in the Cotswolds is Yellow ochre. In the forest of Dean, across the River Severn its more pink, this is because there was a lot of red oxide pigments found in the Iron mines. In the Cotswolds yellow ochre was found.

Generally, therefore, these colours are still preferred, yet there is always an opportunity to vary the tones and hues to some degree.

This slideshow requires JavaScript.

Themed yellow

Posted in limewash | Leave a comment

Spring 2011 Struggling with lime in the frost

January 2011 was taken up with the monumental struggle against the conditions to render a rather nice extension.

A hundred and twenty metres of lime stucco onto concrete block.

Thin coats, lots of frost protection and some luck led to a very pleasing result.

A smooth render should be flat. I hate seeing those undulations that become prominent when the sun strikes the wall at an acute angle.

Corners should be crisp, and ruler straight. The finished surface should be floated as smooth as Bath stone.

Achieving the above is not easy, and the most difficult and time consuming thing is getting the smooth and flat finished surface. The choice of sand and lime is extremely important, and having tried hydraulic lime I am not at all sure that it is the right thing for the final coat. I think that even if the primary coats are hydraulic lime the final coat should be lime putty based as the material is so much more plastic and workable.

Corners are no real problem but there is a short cut: get the first side flat and level – use a straight edge to work to it has to be really flat. When this has set hard do the other side – use the straight edge held flat against the previously finished face, line the edge of the board up with the intended finished surface and plaster up to it, trowelling the plaster well into the corner formed by the board and the scratch coat. Once done the board can be slid away from the corner leaving a perfect edge.

Obviously, we are not using corner beads or dowels with this process. We, of course, do the window and door reveals this way as well.

On this occasion there was no ruling to do, which made life a little easier but the ashlar look is always pleasing when done well, the trick, I think, is to get the joints the correct thickness, the edge of a trowel is not the way.

The render was eventually limewashed to provide the final surface protection and colour.

Posted in Lime Plaster, Uncategorized | Leave a comment

Stacks of fun on Holiday

This slideshow requires JavaScript.

A number of stacks built whilst on holiday, mostly on the coast in Devon and Cornwall but also in Sicily and the Aeolian Islands, (Spot Stromboli in the background) and also the Azores. There is one built of cinders at 1500m on Etna. None are very big, the tallest, built at Southerndown in South Wales, reached about 2 meters. All are precariously balanced and I knock them down after taking the photo.

Posted in just having fun | Leave a comment

Owlpen Manor – Render Repairs

The following is a description of work carried out by JBLimeplastering at Owlpen Manor in Gloucestershire

The masonry revealed by the removal of the cement render was very friable with missing elements. The building mortar used in the construction was predominantly mud/loam mortar and so had suffered badly under the heavy, non breathing render. Despite the alarming appearance, quick progress was made to fill the voids and build up the surface (dubbing out) with stone inserts replacing missing masonry elements and broken terracotta tiles used in conjunction with well haired lime mortar to build up hollows to create a more even surface suitable for applying a trowelled lime render. Once the surface was repaired an initial coat of lime mortar was applied by trowel to an average thickness of 15mm. This coat was diagonally scored to provide a good key for the second coat. Care was taken to build up the surface in order to remove some of the undulations. Extra compaction was applied by beating with a bundle of withies (thin flexible twigs) in order to provide extra key but primarily to compact and counteract shrinkage thereby achieving greater strength. This first coat was left to cure. The second coat was again trowelled on and was similar in nature to the first coat. However the surface was scored with a stiff brush rather than scored to provide a key for the roughcast coat – some further beating with the withies took place. The final render coat was thrown on (roughcasting or harling) to provide a weather resistant rough crust. This coat was applied in a semi fluid state and so is no more than 8mm thick. Care was taken to achieve a uniform pebble textured surface. Once this final textured surface was dry a coat of unpigmented limewash was applied by brush. Two more coats of coloured limewash were applied with brushes before the winter break with the intention of returning after the winter to apply a further coat. During a severe winter immediately following the project a few small patches of surface damage required repairing before the final limewash coat was applied. Mixtures Repair mortars and trowelled coats: One part Natural Hydraulic lime NHL2 Two and a half parts limestone dust from Wickwar quarry (5mm to dust) Horse hair: A generous handful to two cubic feet of mortar Roughcast mix: One part NHL2 Two and a half parts South Cerney grit sand. Limewash was made from lime putty: Pigments: The main colour used was Yellow ochre (coded Y42) Modern pigments are too vibrant and rich to achieve a correct vernacular result and so the tones have to be tempered by the addition of Umber: Raw Umber, as used here, imparts a cool tone trending towards green whilst Burnt Umber imparts a warmer tone trending towards red. Notes on the Mortar mixtures. A decision had to be made regarding the type of lime to be employed. A large consideration was the time of year and exposure of the gable. These factors ruled out the use of lime putty as the binder due to its slow setting rate and its vulnerability in the first few months after application and so I chose Hydraulic lime as the binder. I was very conscious of the condition of the masonry and felt that I needed to try and achieve a render that was tough and weather resistant without being too hard and unbreathing. With this in mind I selected a local limestone dust as the aggregate – the nature of which created an easy flowing mortar. Hair was added in generous quantities to add tensile strength to the render which would be kept as thin as possible, I felt it was important to keep the weight of the render to a minimum – a thin render will carbonate quicker, shrink less and stay attached to the wall longer. JB

Posted in Roughcast render | Leave a comment