
Recent Comments

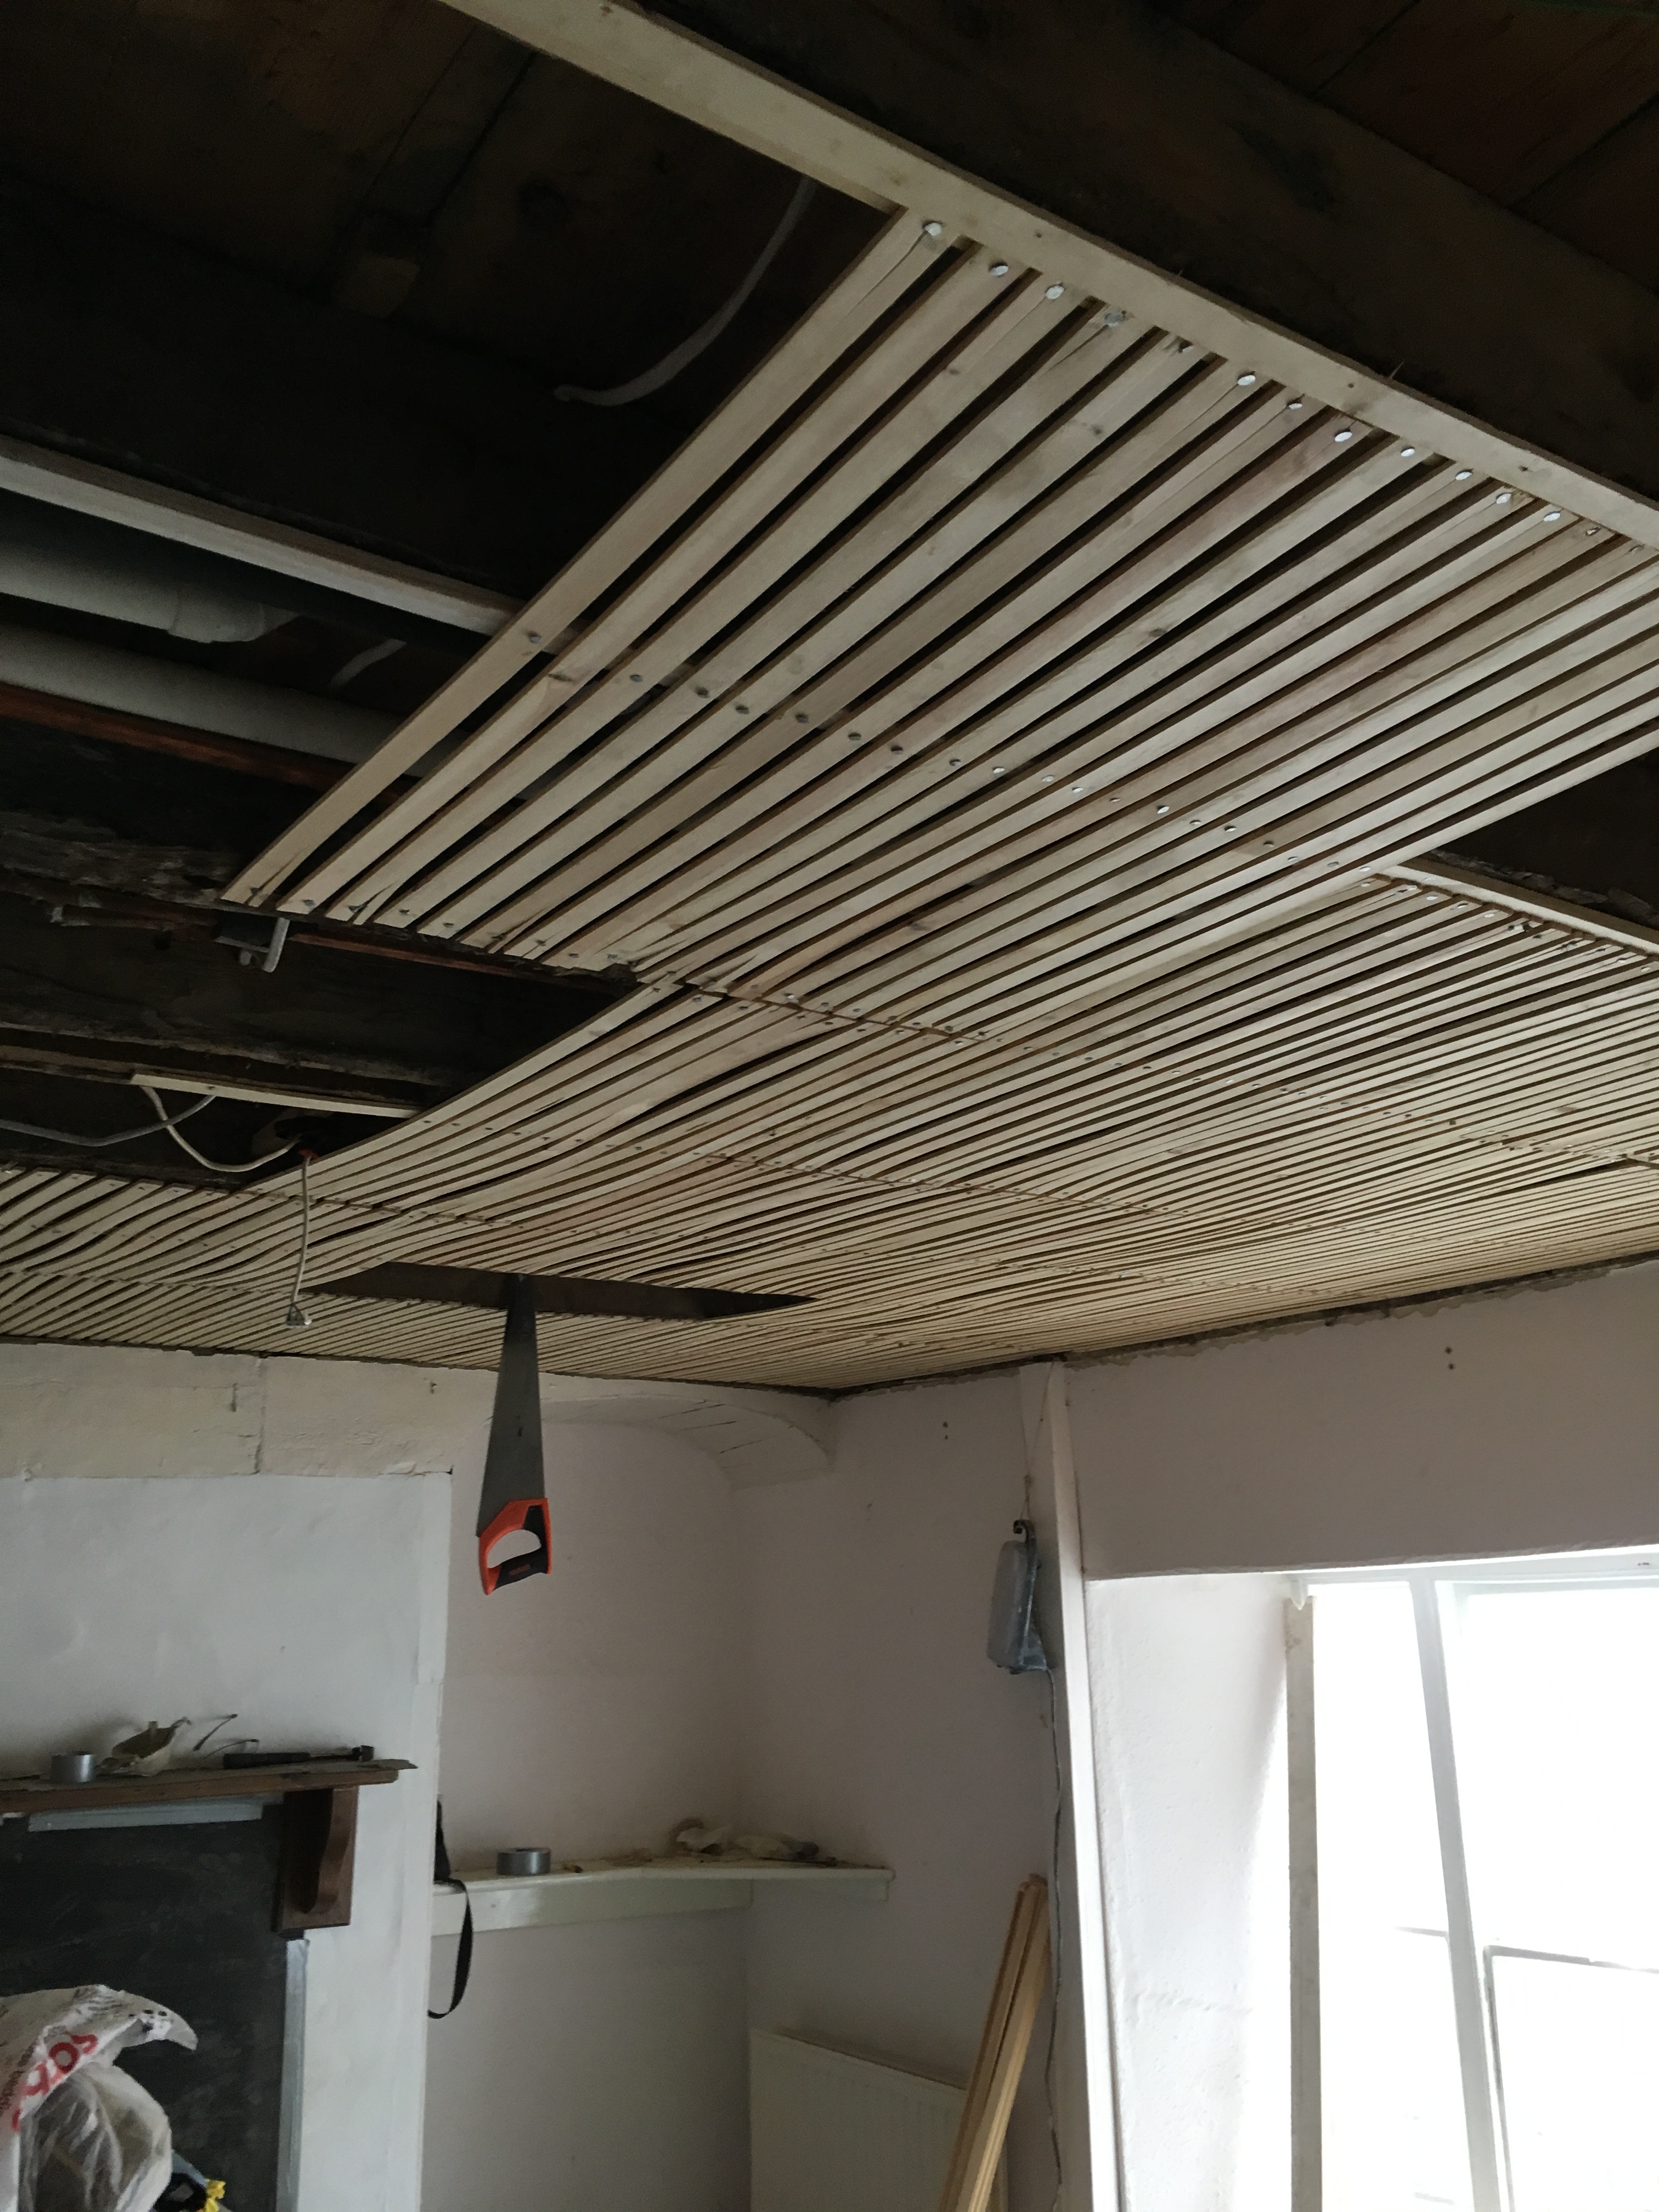
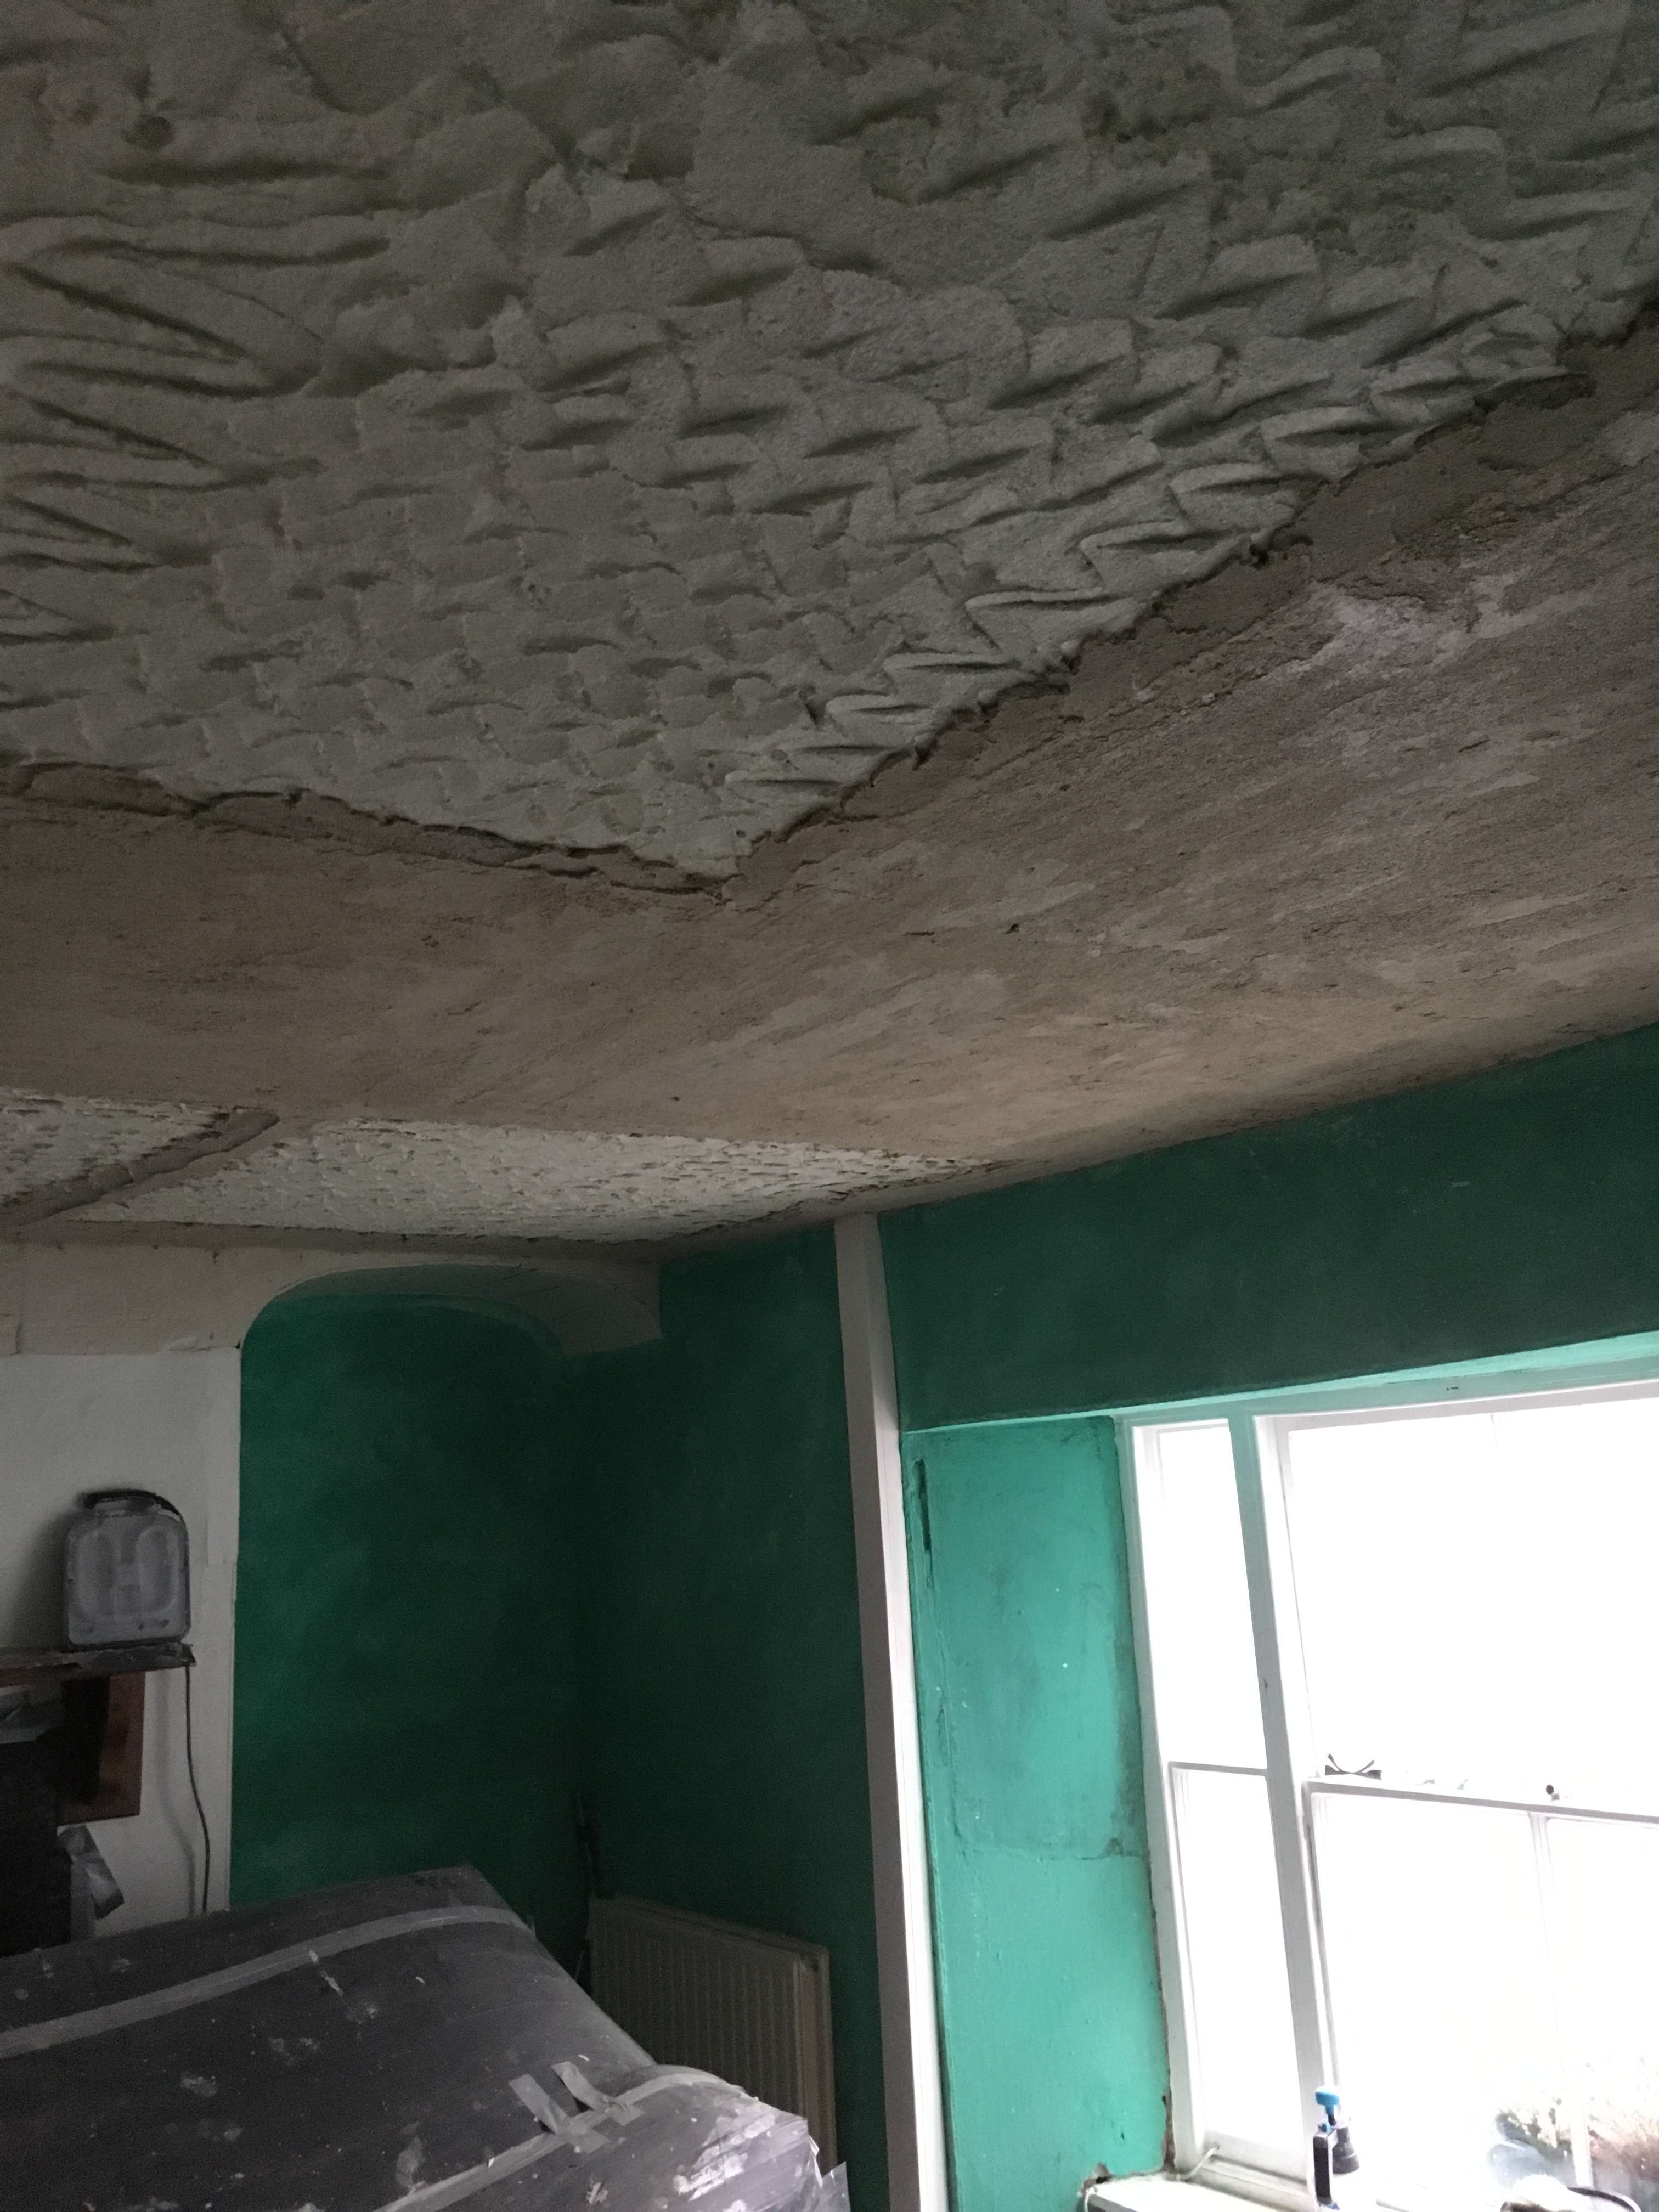
the difficulty with this ceiling was that the floor joists were so bent in the middle the new ceiling could not be made flat – the two alcoves governing the level of the ceiling edge. But by carefully compromising and balancing out the undulations the new ceiling looked perfect.


Occasionally an interesting job comes along; in this instance just a little limewash order but the colour had to match a rather bright green nylon fabric, the colour is close to a bright green apple. It was certainly not within the capabilities of my standard stock of pigments: yellow ochre, red oxide, raw umber, etc. I have green but it needed some very bright yellow so I ordered Yellow pigment coded name 4G from Rose of Jericho. It wasn’t a yellow I have used before but I knew I needed the brightest most lemony yellow they had.
The pigment worked perfect as the picture shows.
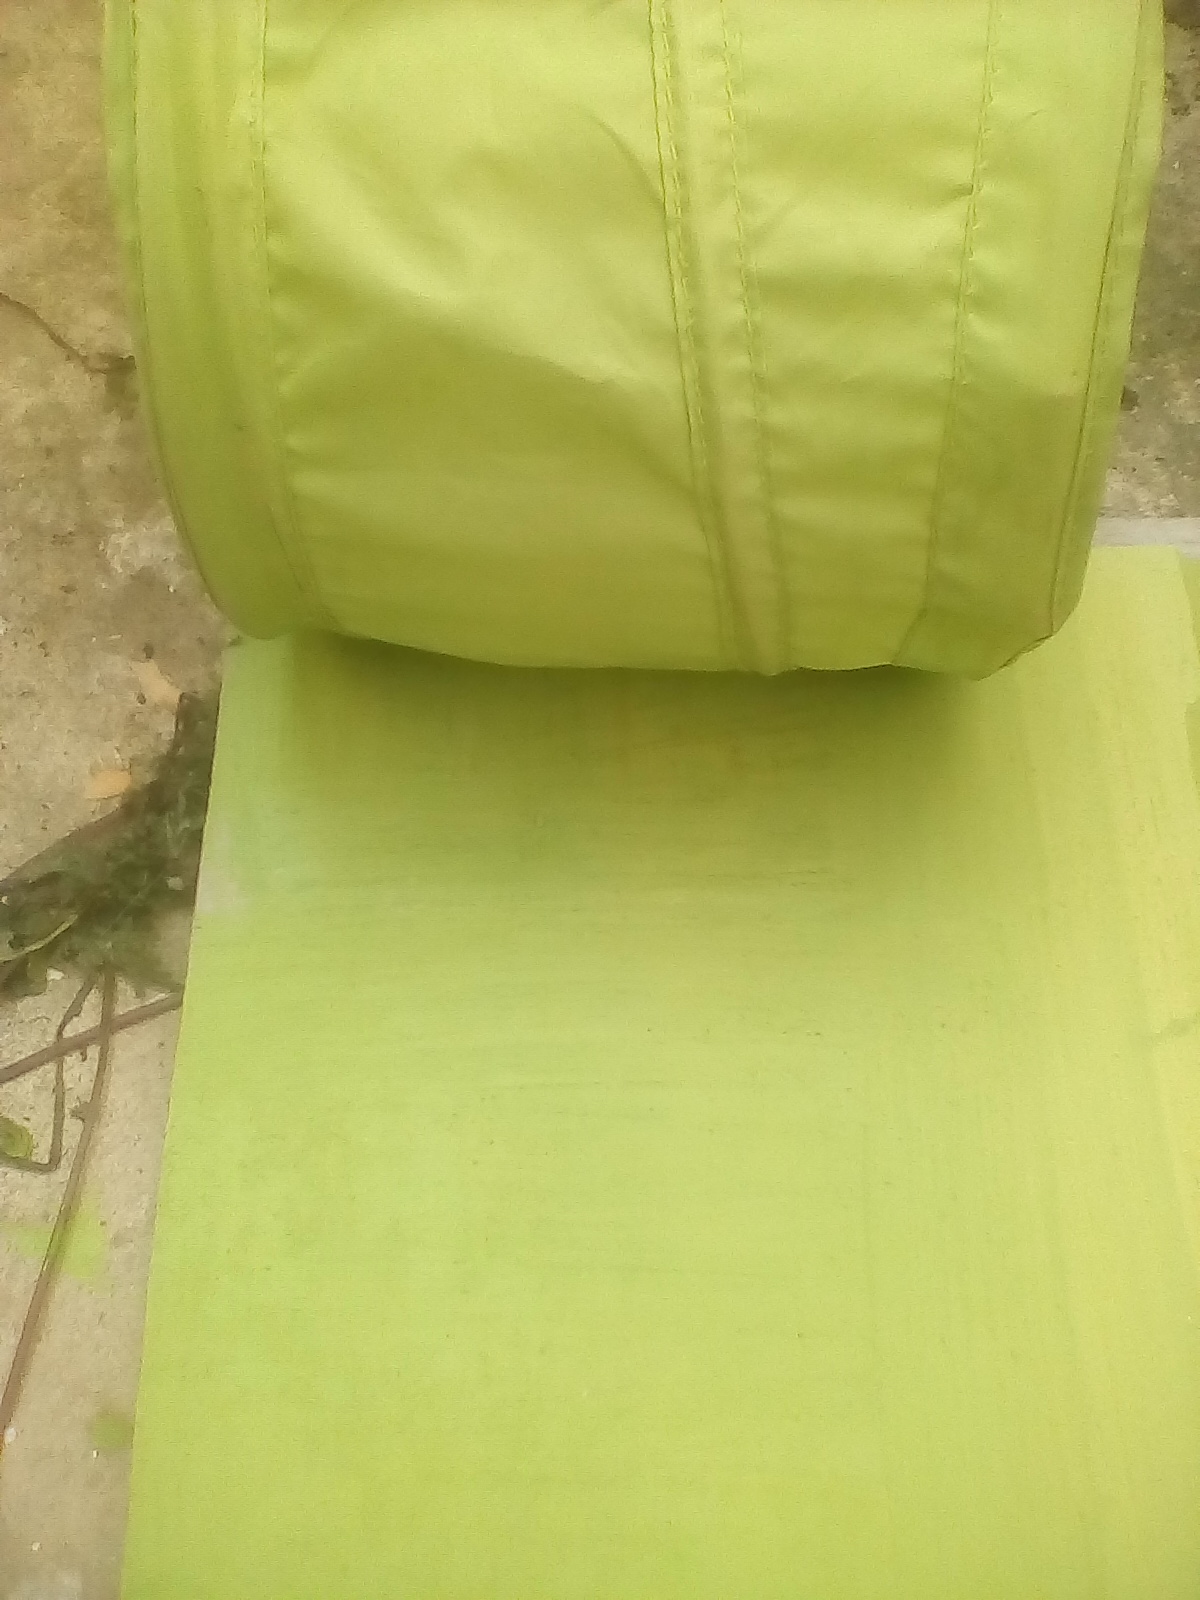
The skill with matching colours is being able to sense what pigment you need to add to get nearer to what you want with the added obstacle of limewash drying a few shades lighter than the wet colour, a bit of red? more umber? a touch of yellow, maybe it needs some black. This is not so much a problem when trying to match a wet sample of limewash although it is possible to get a very close match with a wet sample only for it not to match up with the original when both are dry. In this case it is only two pigments Green and bright yellow. I once saw recipe with 6 pigments in it which seemed excessive to me. I personally think three is enough. The classic Cotswold yellow is ochre is really only two: yellow ochre and raw umber. Not Burnt umber which is too warm a colour.
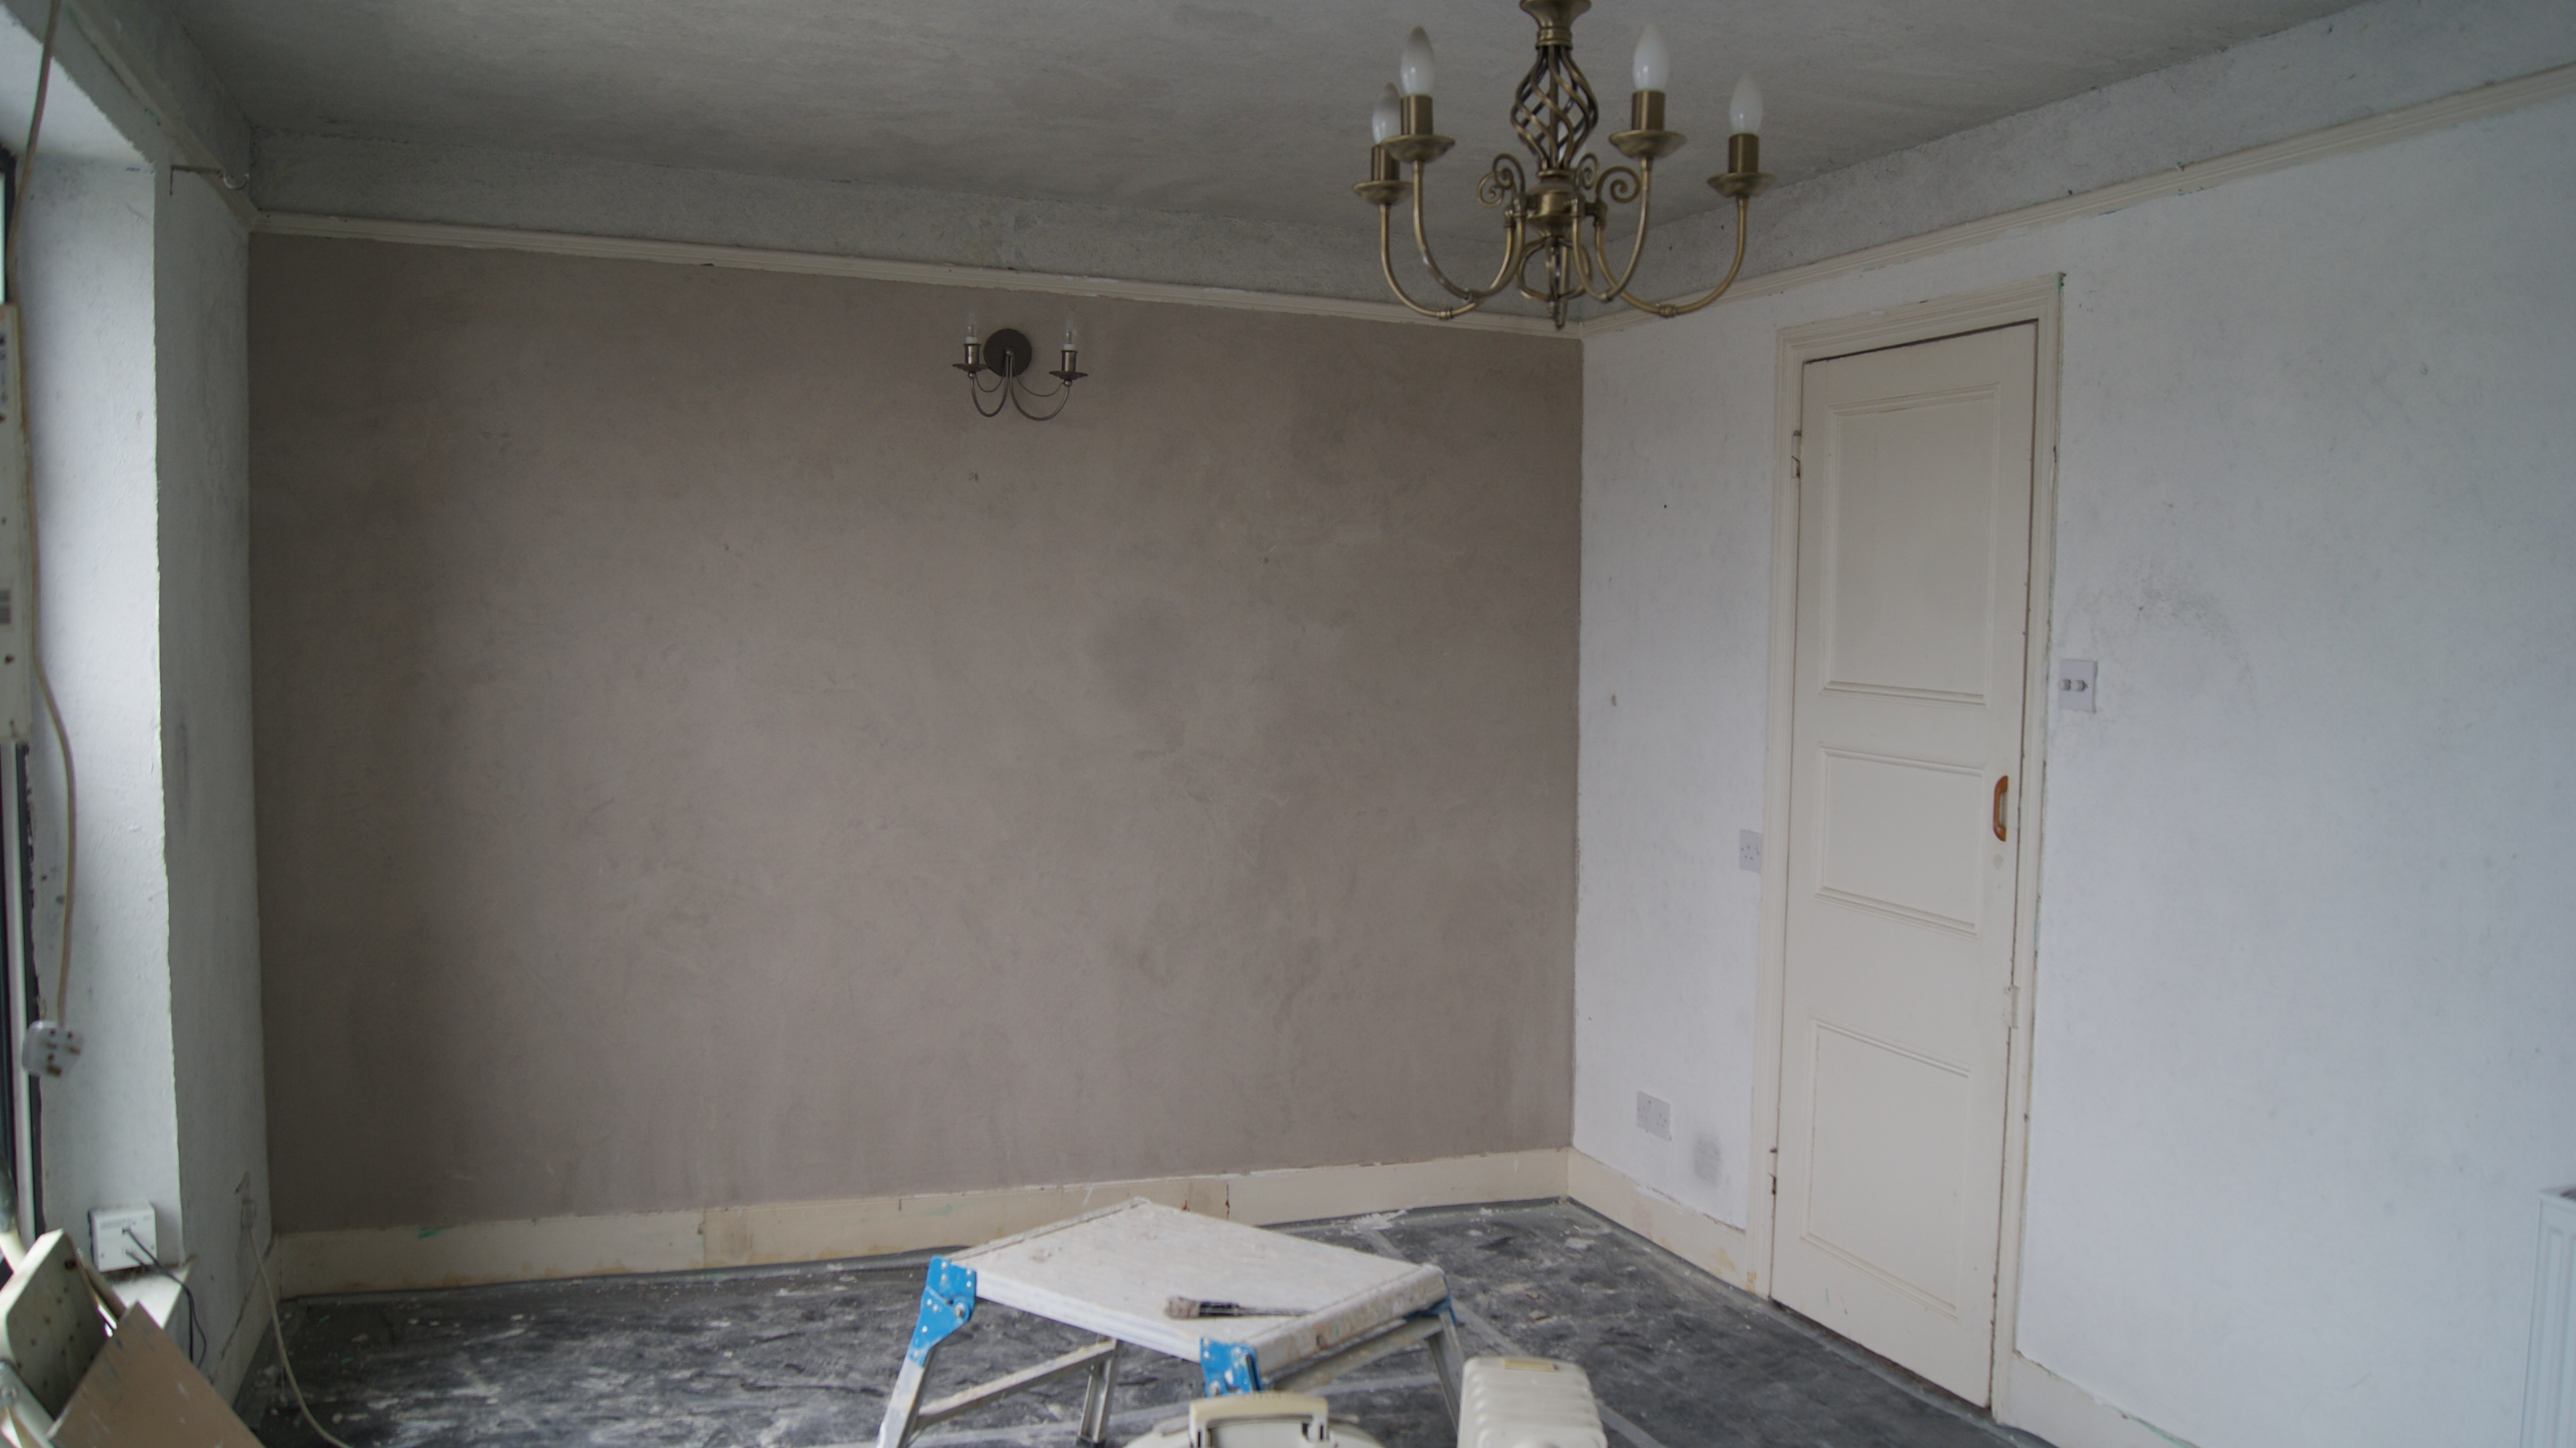
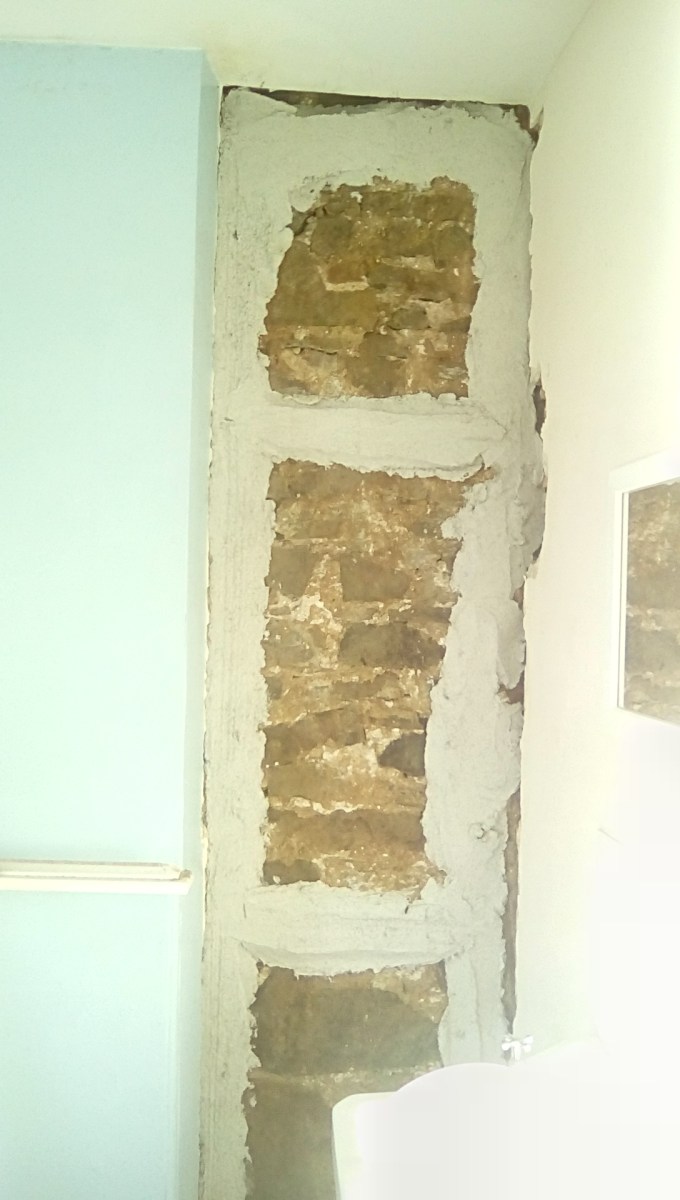
The walls were still lime plaster, some on masonry and some on lath but all were painted with purple emulsion. They were pitted, some of the top coat of plaster was peeling off and the walls had been chased for re-wiring so it obviously needed attention.
When we bought this house I realised I needed a pretty good plaster recipe, I was not going to be re-plastering everywhere because we are living in the house and removing old lime plaster is a dusty job. I also wanted to avoid the time and cost of complete re-plastering.
My plan was to skim over the walls with a thin coat of lime and then paint with clay paint, repairing what needed to be repaired, patching what needed patching but keeping as much as possible.
The breathing issue is not so relevant with lath and plaster stud walls but is relevant with masonry walls. But what is important is a good key so I pecked all the walls or scratched them were pecking was a bit too disruptive for the lathing. Pecking or otherwise breaking through the emulsion coating to some degree allows the plaster to breath and with a good coat of lime over the top this is helped further. To aid further adhesion I gave the walls a coat of grip primer.
Once the walls had been prepared I needed a high performance plaster to work with. I devised my own recipe jblime finishingplaster

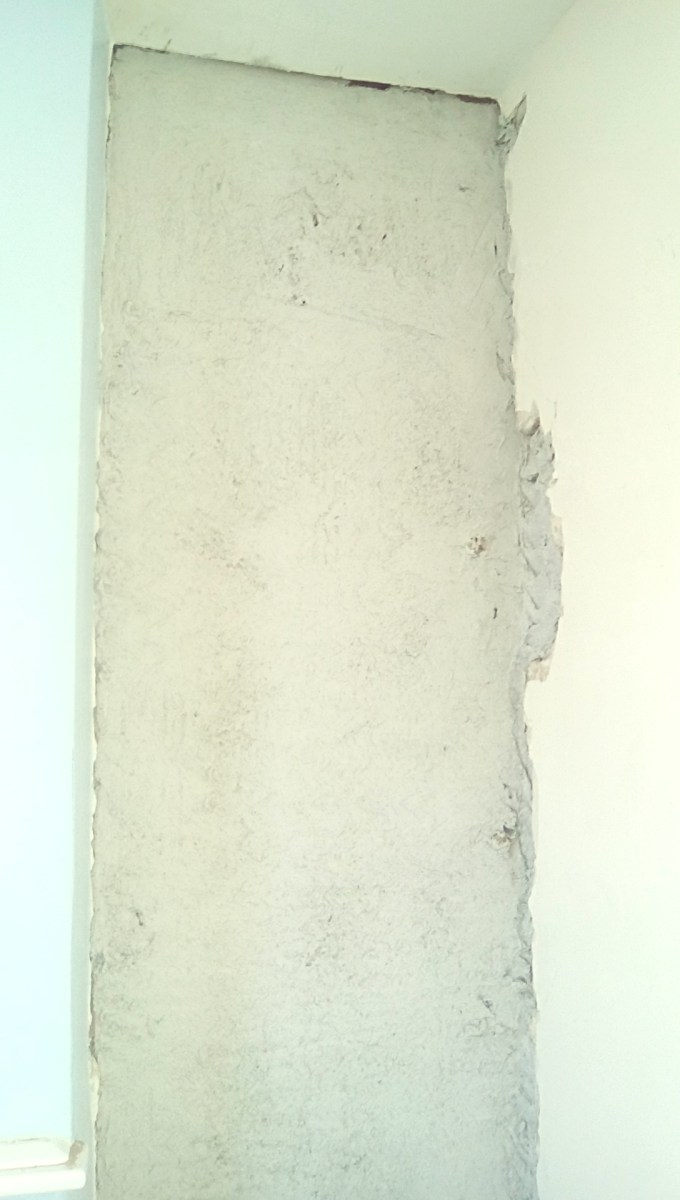
the walls pecked and primed ready to skim
The first coat of plaster was 3 parts lime putty, one part sharp fine sand and lots of short horse hair applied about 2mm thick.
the beginnings of the final coat of plaster – tinted brown
When the first coat had dried off a bit it was time for the second, 3 parts lime putty to one part sharp fine sand and plenty fine manufactured fibres. I added some brown pigment to create a contrast between this coat and the first so that it was easy on the eyes seeing if I had missed any bits.
The first wall done
The next day I was able trowel the plaster flat and smooth, compressing it and tidying up the edges, it is time consuming but very important.
When it had dried, and being no more than 4mm thick, it didn’t take long the new plaster was painted with Earthborn clay paint. I bought white and tinted it with black pigment to get a light grey, I tend to tint all our paints in the house, one room was tinted with iron oxide I found oozing out of the sea cliffs west of Westward Ho! another room uses paint tinted with Bideford Black also got from the sea cliffs. This time I bought my pigment from heritage cob and lime who supply my excellent lime putty and sand.
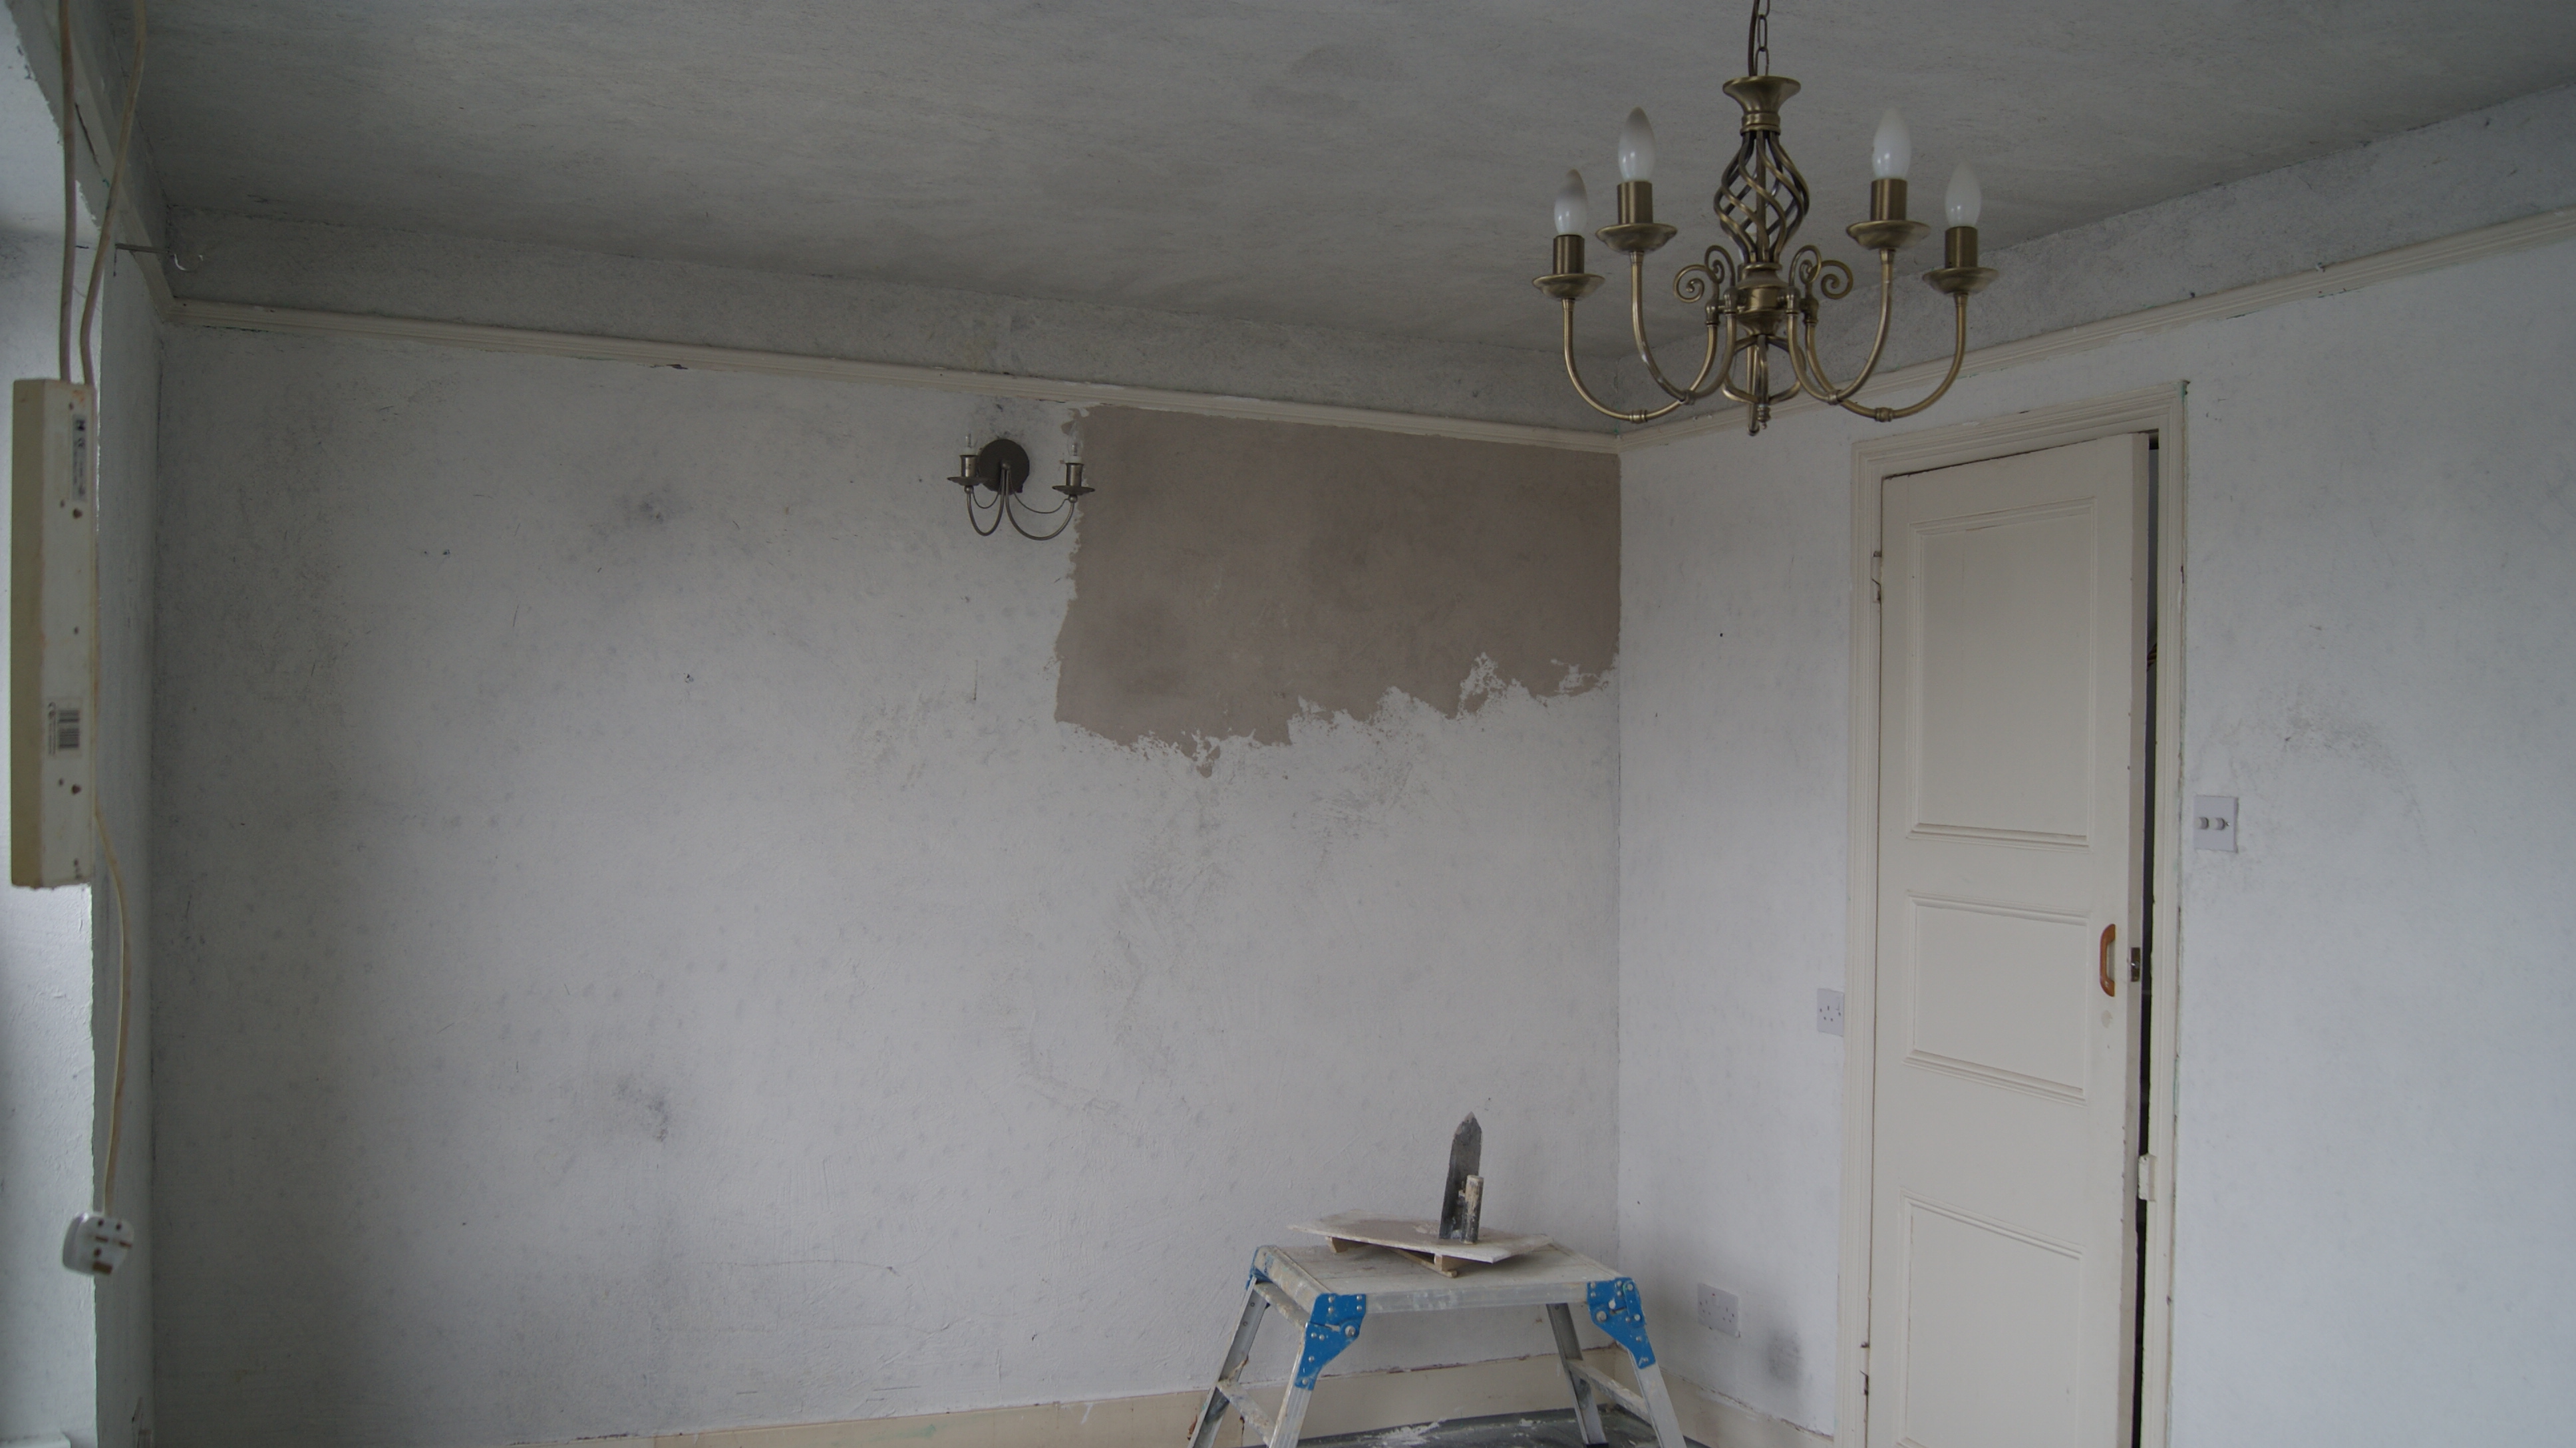
with the furniture in and ready for me to lounge in.Once it was painted and began to dry it was obvious were the damp was as those places were drying much more slowly, I knew they were damp anyway but it is always nice seeing the new plaster dry out after years of not being able to.
Any way thats another room done and now I only have the ground floor to tackle but that wont be until late spring 2018 so we will be living with crumbling plaster and wire chases for a while yet but at least we can watch telly in relative comfort and style.
http://www.buildingconservation.com/articles/mythmix/mythmix.htm
This article by Gerard Lynch was published in 2007.
It’s been ten years and still the ready mixed lime mortar producers haven’t fully taken it on board.
The most enlightening statement for me is this:
“under analysis, the majority of historic lime mortars are not commonly found to be 1:3 but typically vary between 1:1½ and 1:2, just as the original mortar makers and craftsmen intended. This is borne out by extensive analysis carried out over many years by The Scottish Lime Centre Trust. (At the last count the organisation has analysed around 4,500 historic mortar samples, approximately 80 per cent of which were from Scotland, 10 per cent from England with the remaining 10 per cent from various other countries.) The average lime:sand ratio on the organisation’s entire database of historic mortar samples is around 1:1½.”
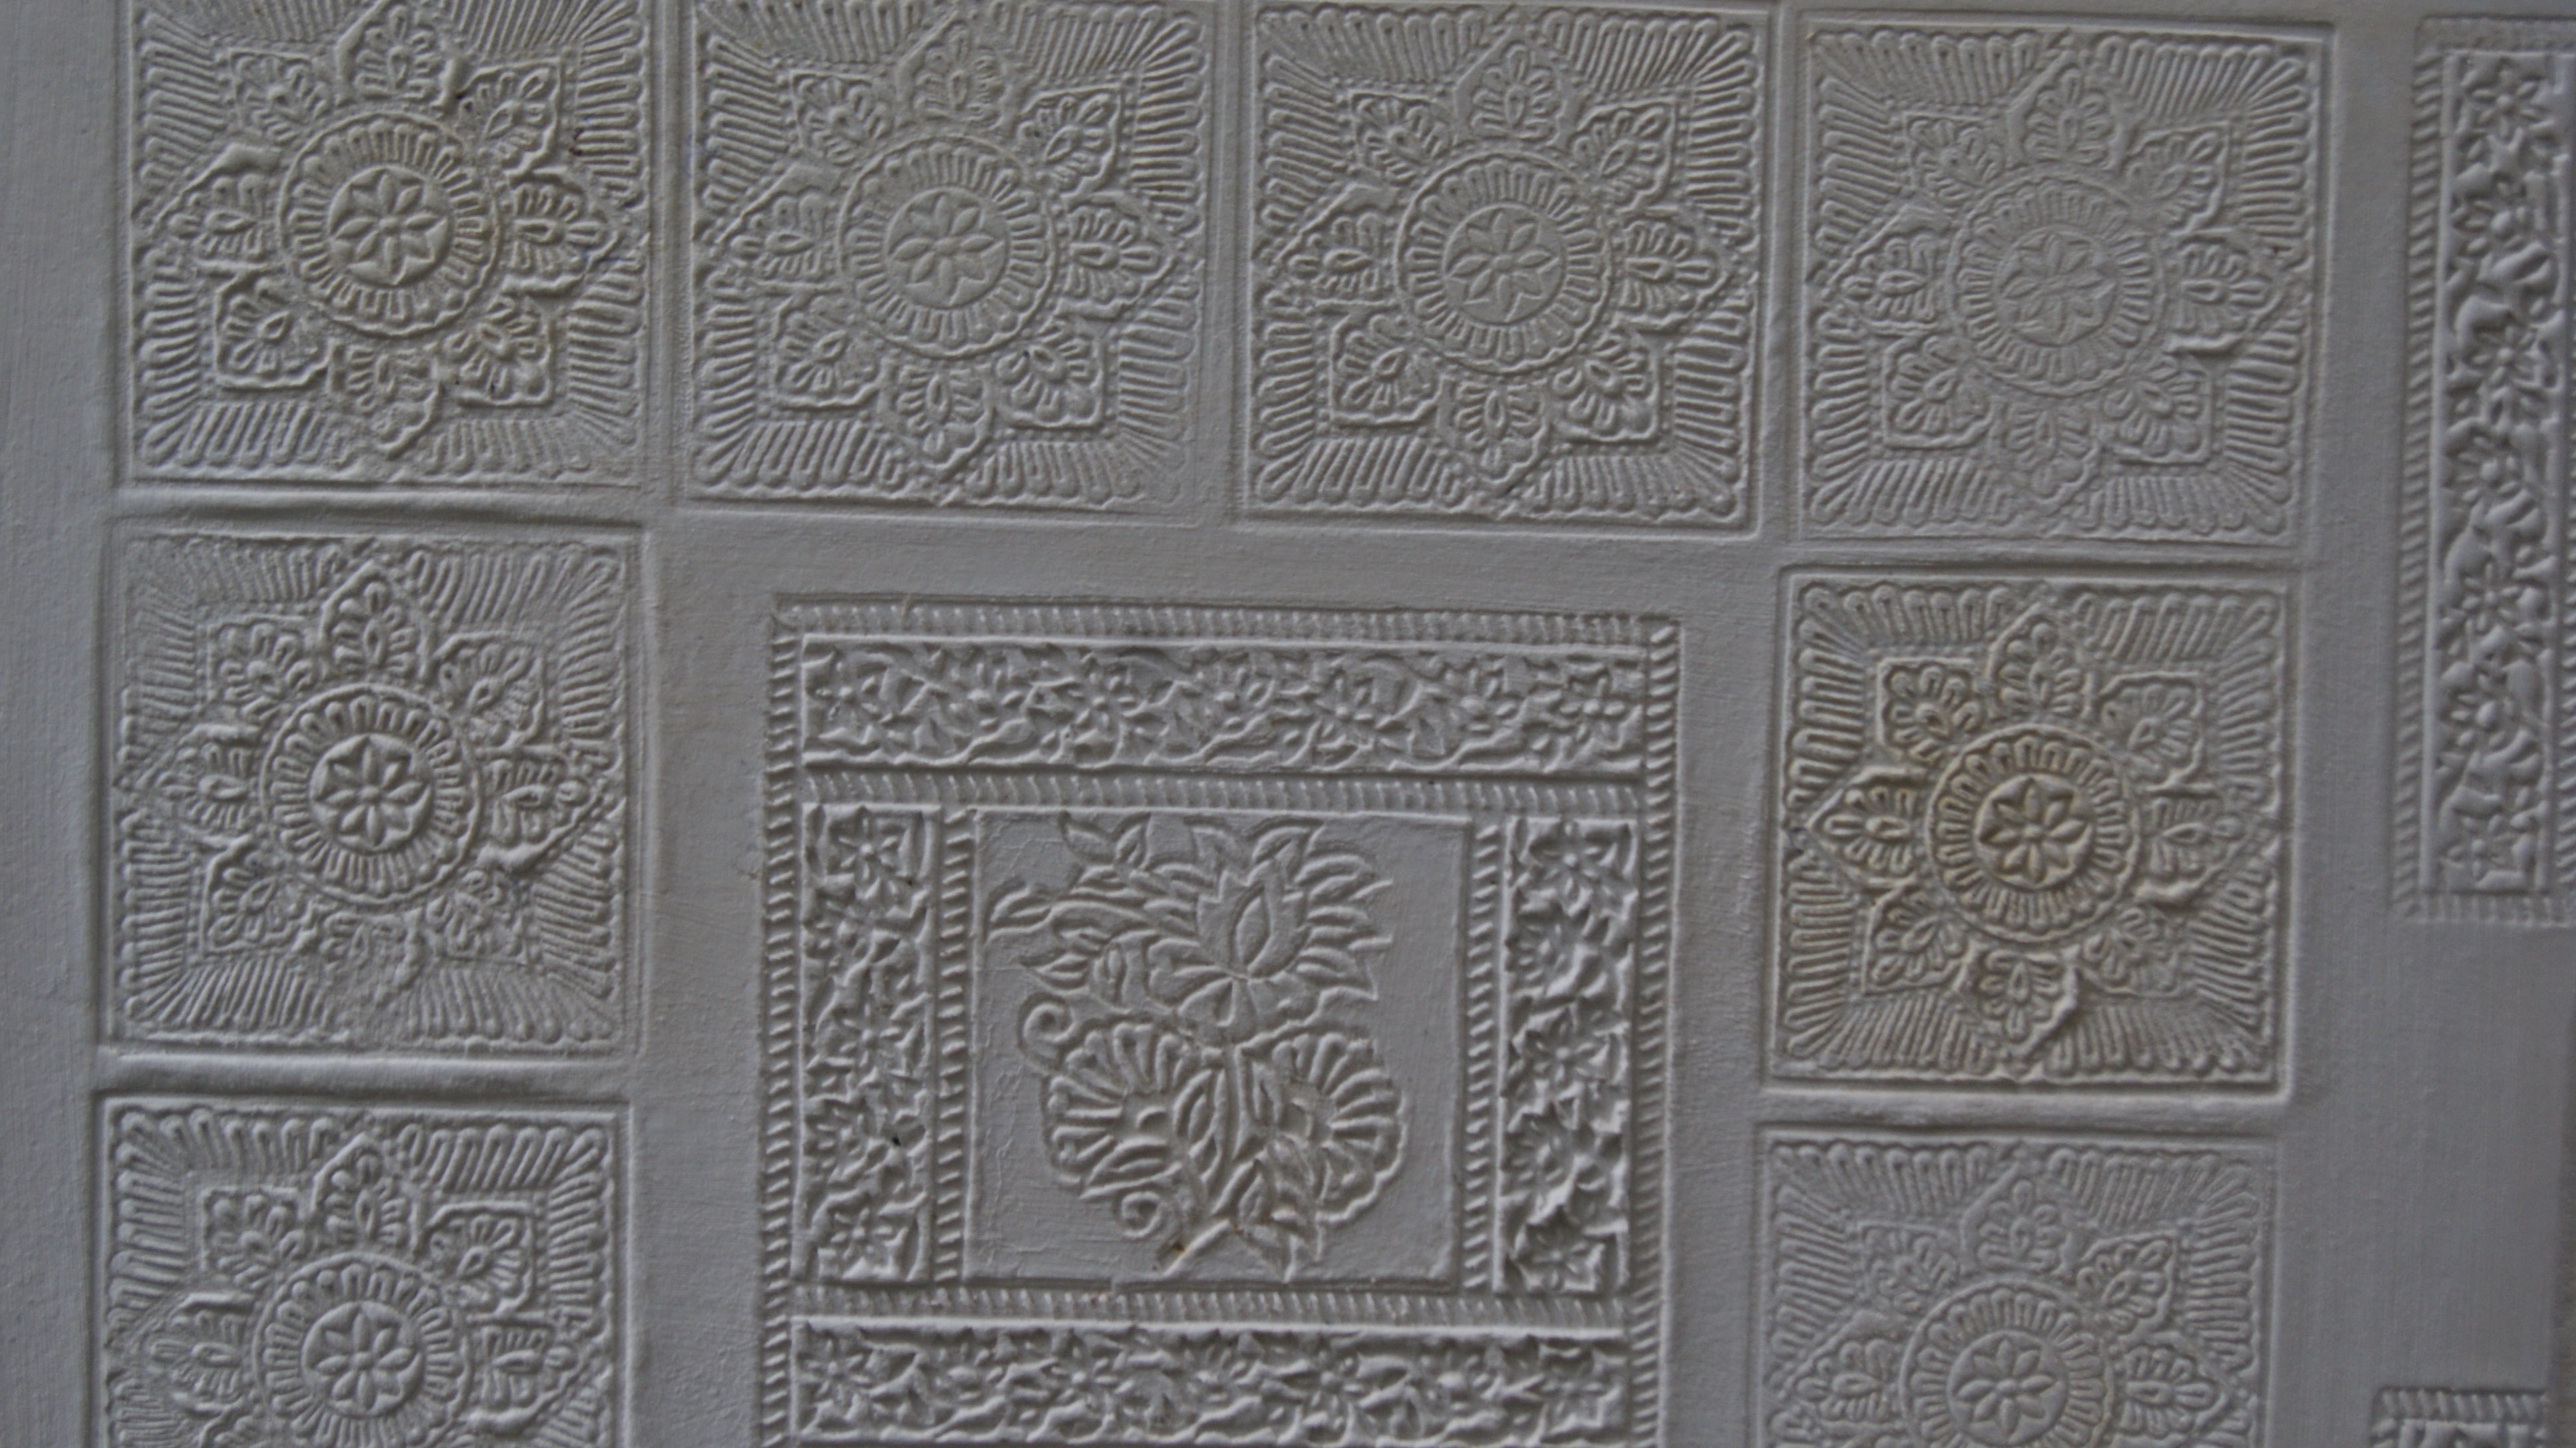
Stamped plaster work. Initial trials of stamping lime plaster with wooden blocks using an innovative plaster recipe. The plaster can be used as an ultra fine lime finishing plaster which can be applied 3-4mm thick and simply trowelled smooth but which can also be imprinted with quite detailed patterns.

the block used here is 3.5 inches square.

the bigger block is 6 inches square.
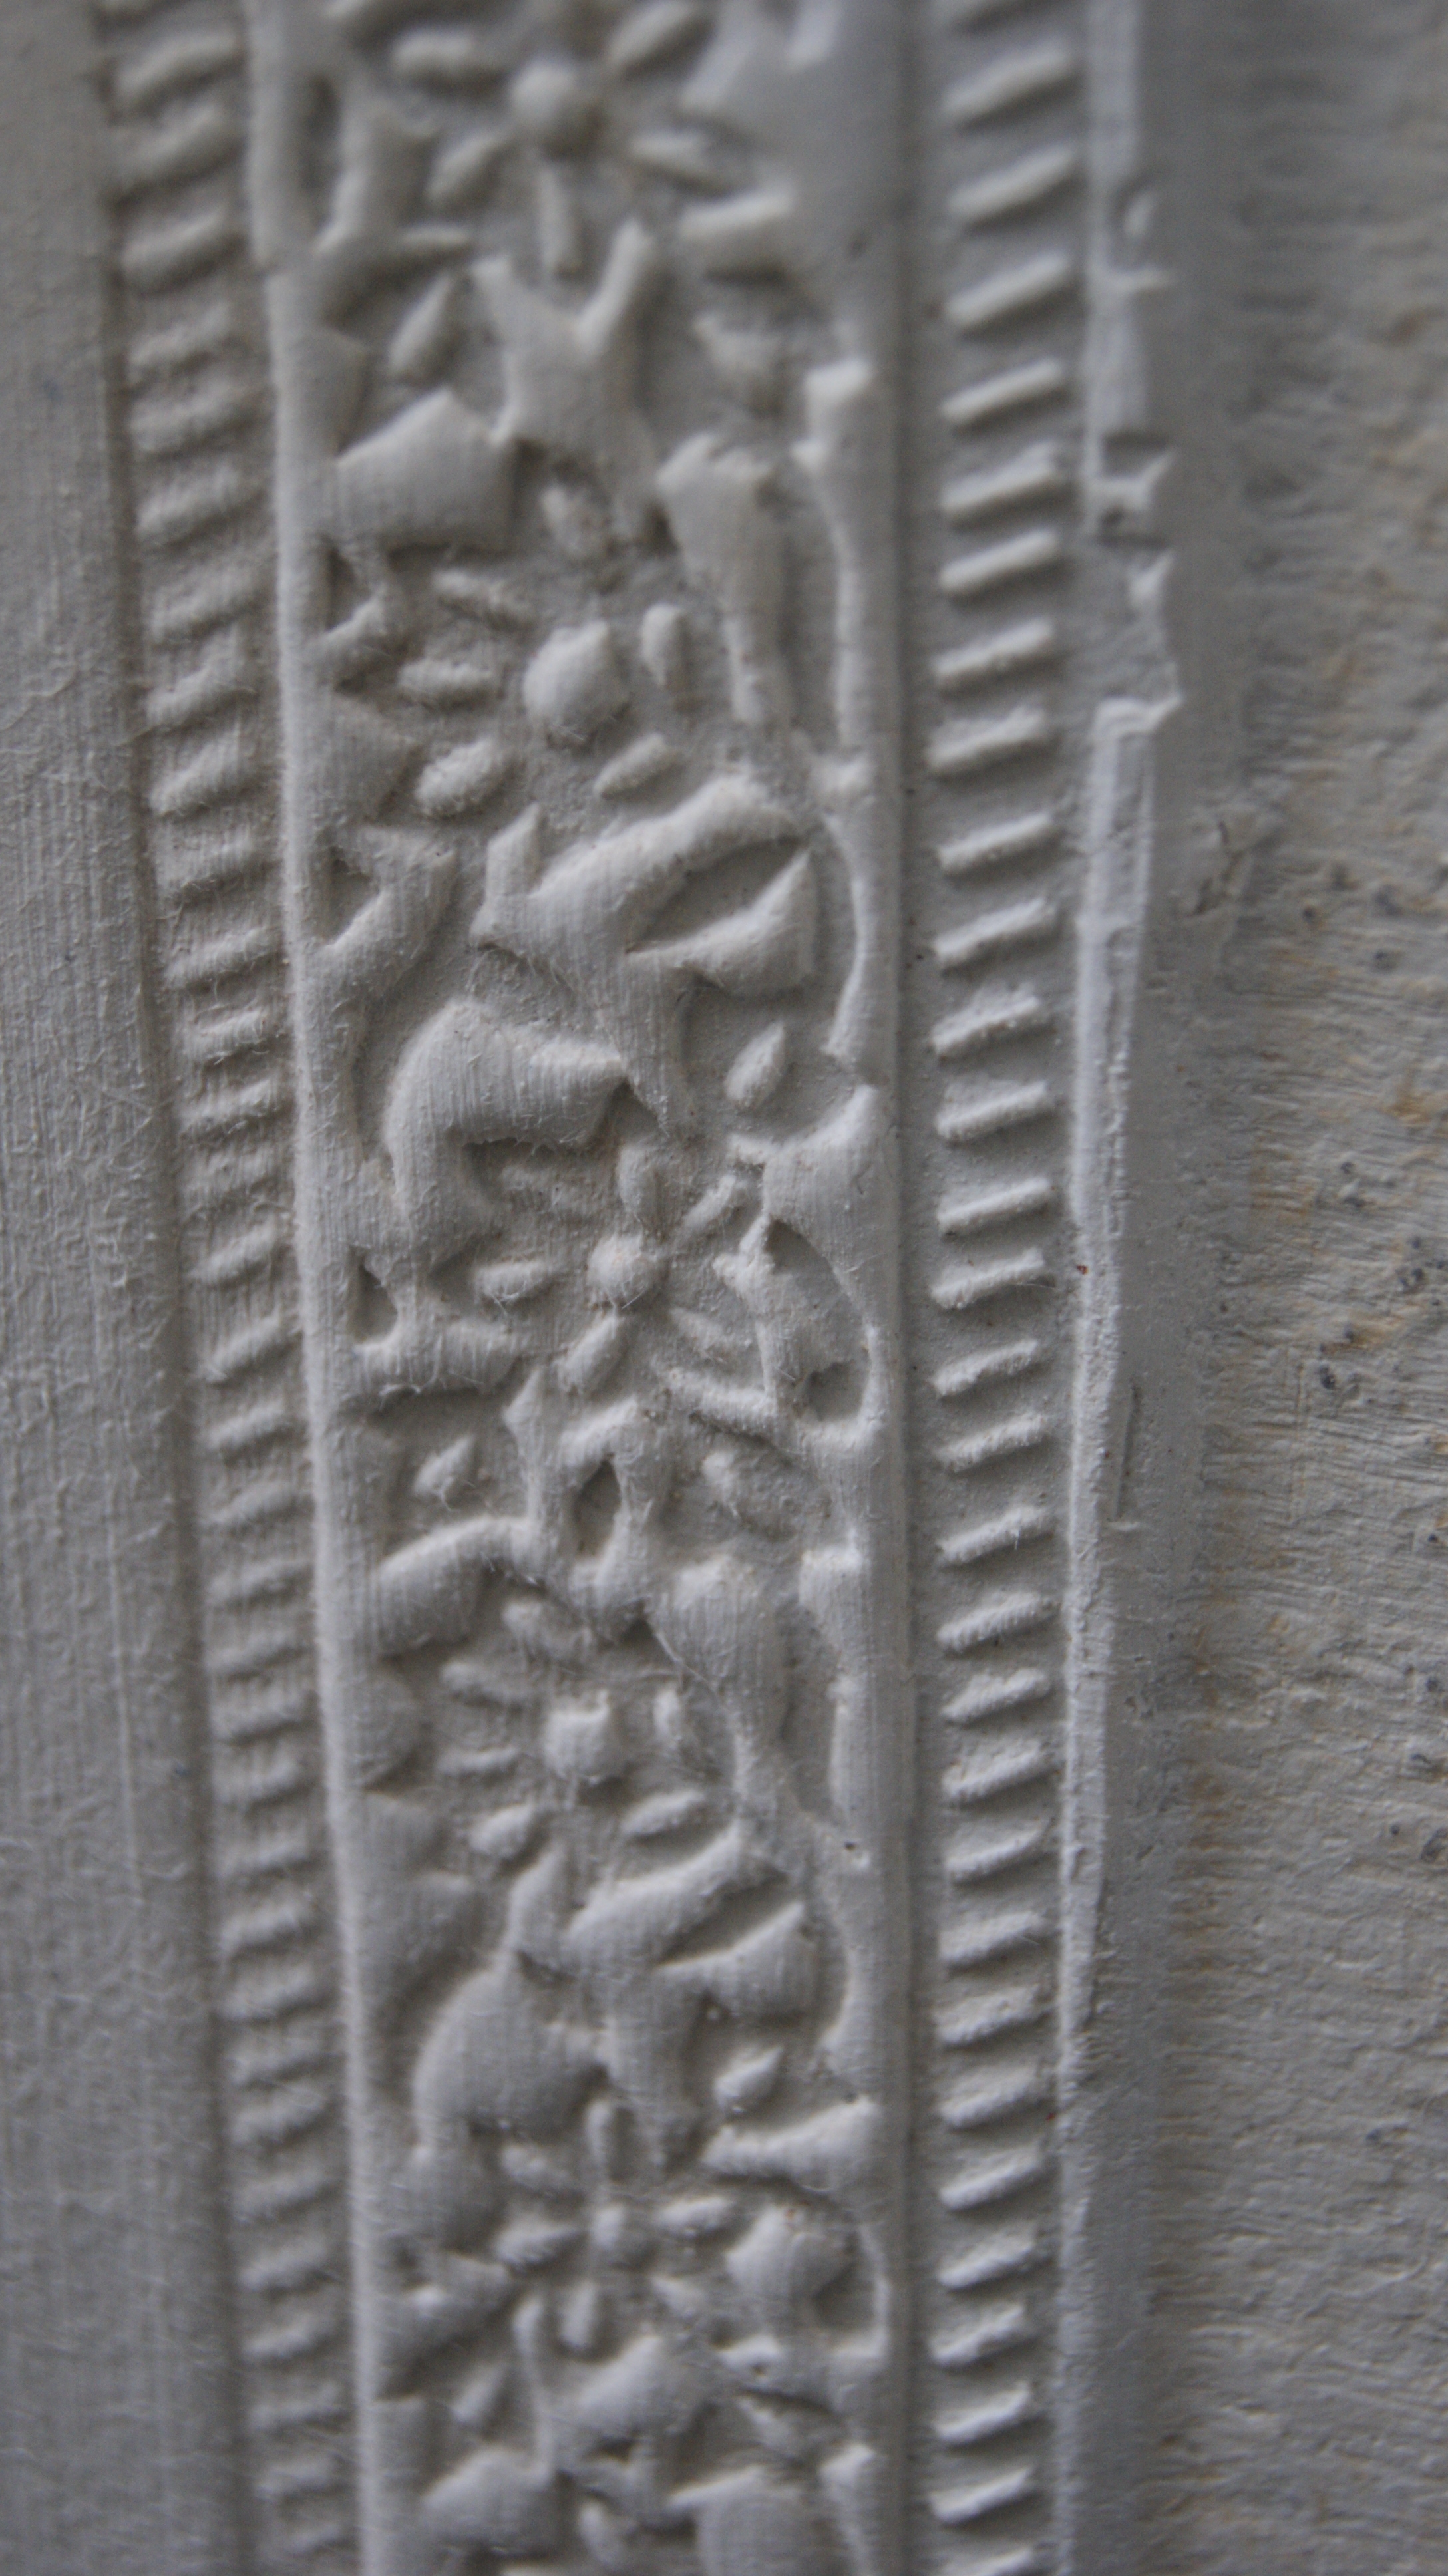
This is a close up of the border of the bigger block showing the detail .
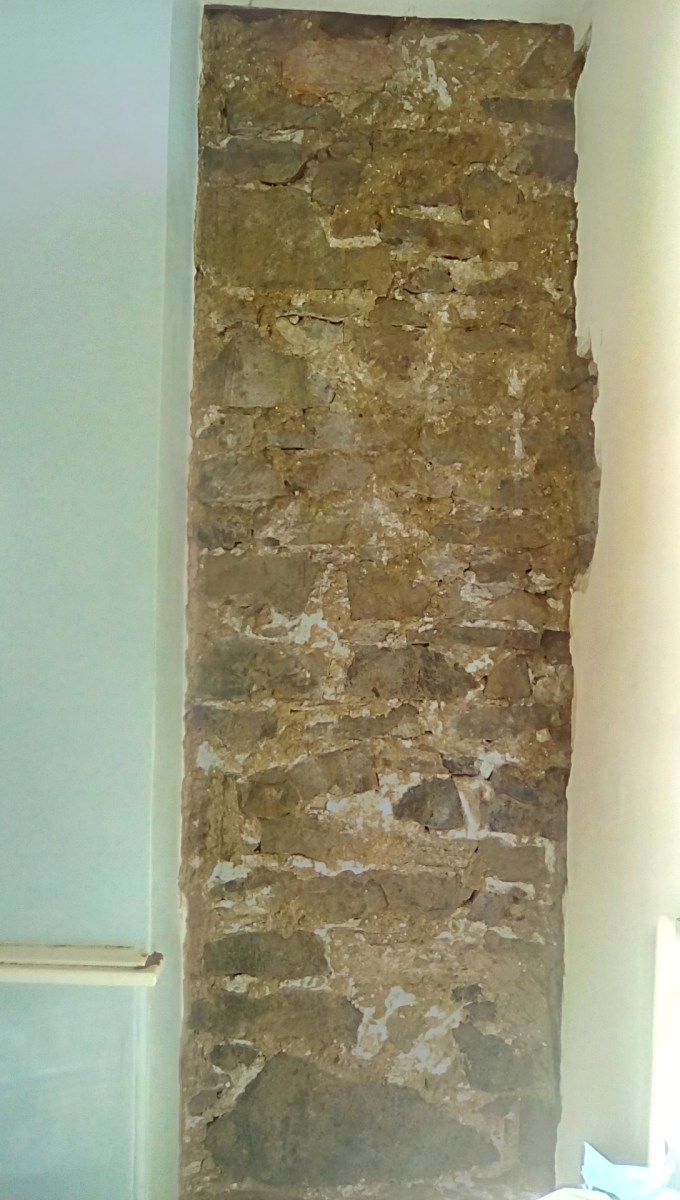
start with a bare wall, loose material removed, brushed down and lightly wetted .
apply plaster around the edge like a frame ; i got the left hand one flat then some horizontal ribs to project the levels to the other side, then complete the right screed
fill in the blank areas bring level with the frame. This is only the first coat but it is brought level, if it isn’t what is the point? After trowelling I went over it with a couple of straight edges; one long, one short – up and down and side to side sawing movement across the surface just to take off the high spots.
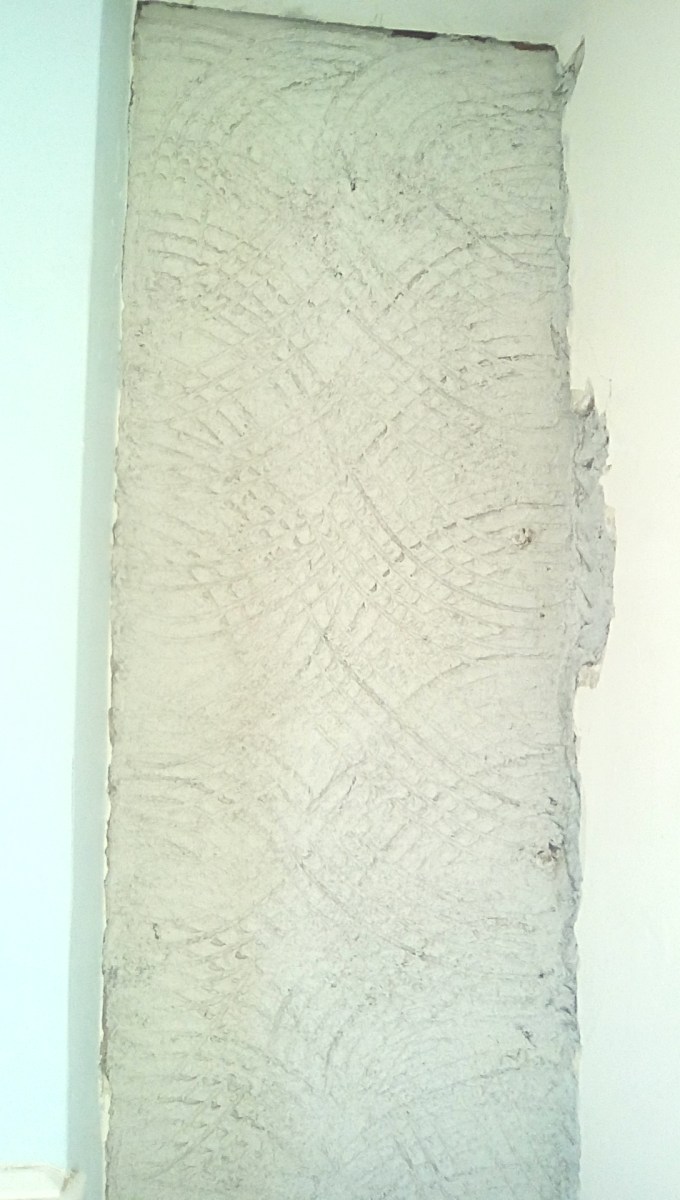
key with a comb ready for the next coat, which will be easy as this is already more or less level, some shrinkage will cause this first coat to be less level than it was at the start, this wont crack because there is enough hair in it to stop that but it will still shrink.
So there you have it, a very small bit of wall I know but the principles are the same all the time, get the plaster level with the first coat not the second, the second coat just brings the plaster to the correct depth. If your first coat is not level what was it’s purpose?

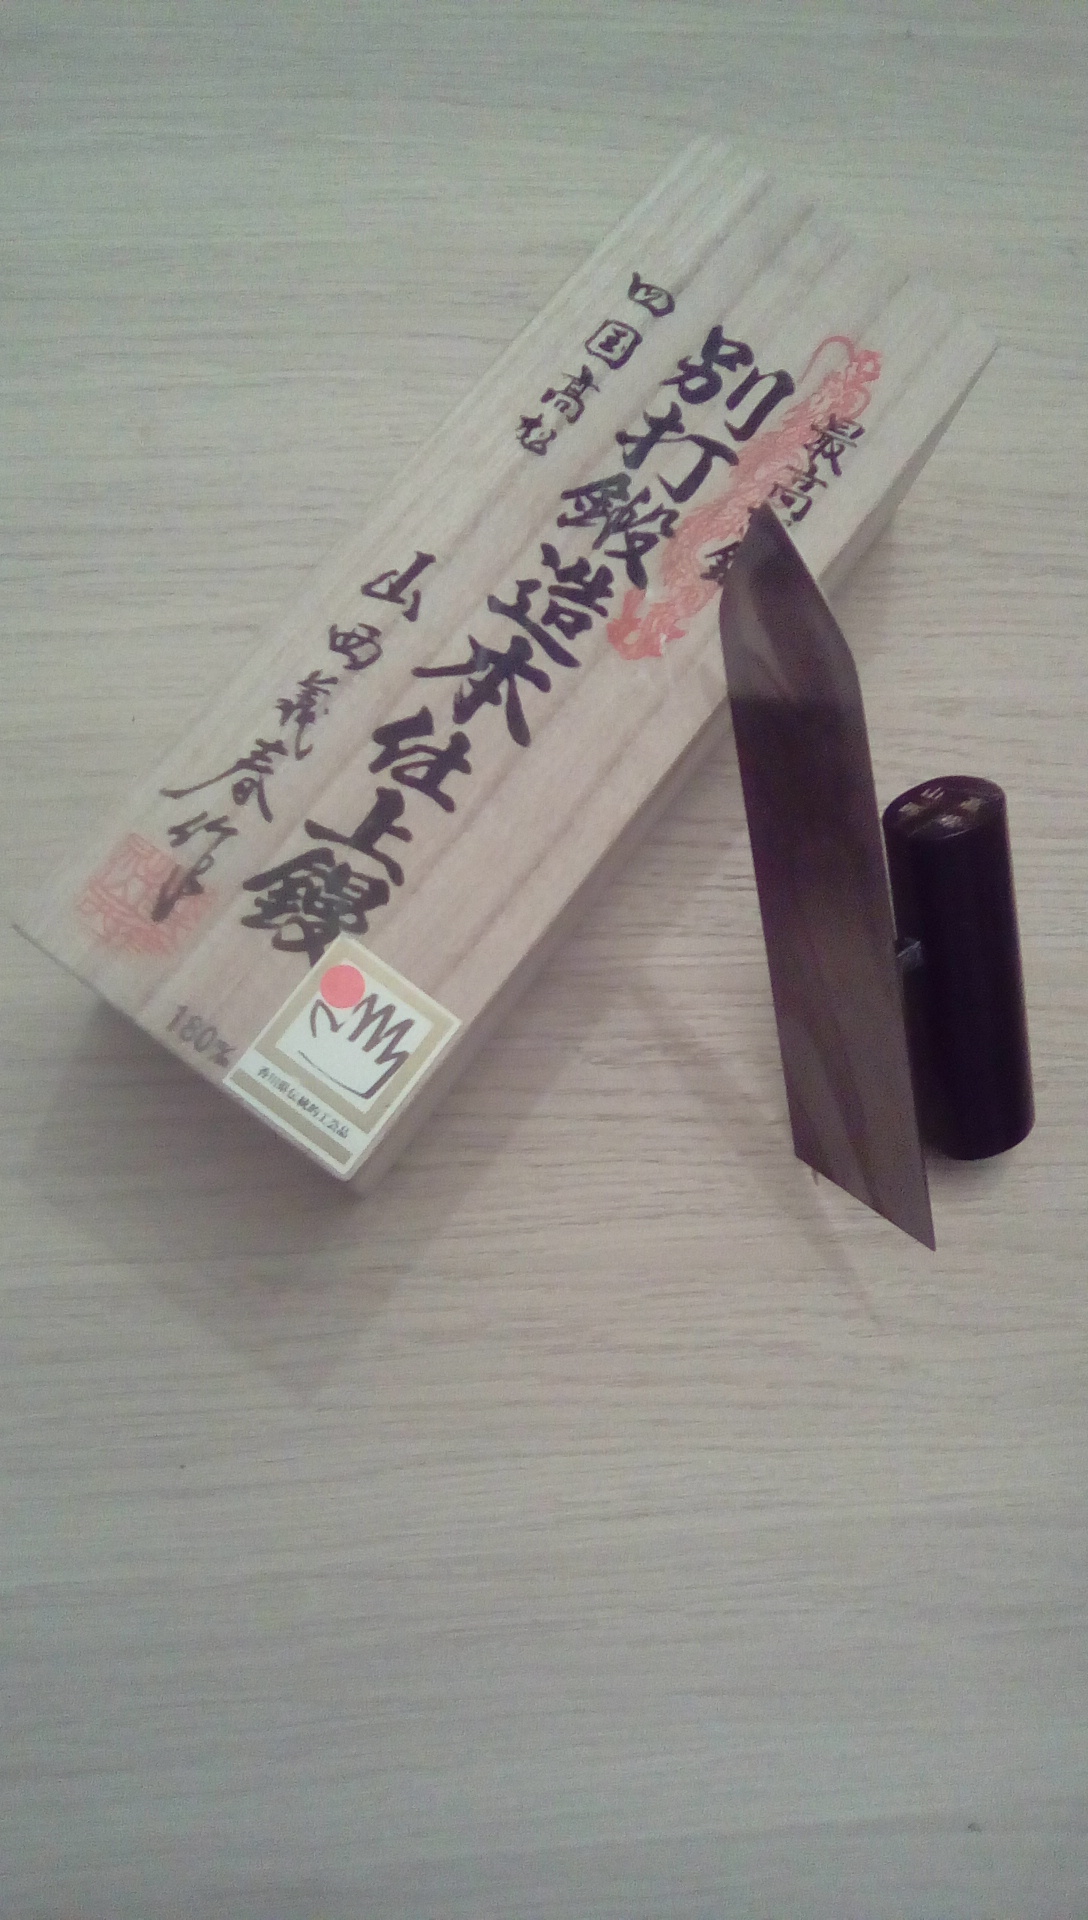
These are the only plastering trowels I use. Starting at 9 on the clock: a medium sized Jigane laying on trowel, next a little really flexible polishing trowel, at the top a larger jigane, recently used for laying on the finishing plaster, at 3 a medium sized Honyaki finishing trowel which I also use for the finishing plaster. at the bottom a smaller Honyaki which I use both for laying on and compacting the finishing plaster, then at 8 on the clock, my new Honyaki trowel solely for compacting and smoothing. Also three small corner trowels.

applying the first coat of finishing plaster
A testing job for my own recipe JBLime finishing plaster but one that any other lime plaster may well have not managed so easily.
The walls are generally old lime plaster but have been painted with emulsion, wall papered and patched and in places over skimmed with nice pink gypsum. The main patches were done with limelite.
In the picture you can see the new finishing plaster going on (the darker grey) Areas where limelite was removed and replaced with a new lime plaster and the green is the wall prepared with a grit primer after the wall paper was removed.

The fire place was a bit of fun. The three walls are gypsum apart from the one on the left which is half plastered in cement. They were all painted with emulsion which was easily scrape off. I keyed the gypsum to get a good mechanical fix for the plaster skim.
The wall can be seen with the grip primer, I did not want to entirely rely on the grip coat so I also keyed the old plaster with my spiked roller (lime plastering plasterboard. with the correct tool and material it works well.) which has come into its own for breaking through the surface of painted plaster. It takes a fair bit of force but it soon does the job and gives a decent key without making a great lot of damage, it is also useful for stressing the plaster all over so that any loose or suspect bits of plaster are soon found out and can be replaced.

The final coat applied, all smoothed and flattened. It is still drying here and there; on a job like this, with all the different substrates to contend with, drying is very uneven. The new lime patches at the bottom reached trowelling condition within a couple of hours, the plaster on the cement took two days. The plaster on the gypsum was reasonably quick being trowelled the following day, which just called for patience because as I said, the left hand side was gypsum down to half height then cement, which, to add a little extra difficulty, was set back from the gypsum half about 3mm so it needed and extra coat of plaster. The rest of the grit primed plaster reached trowelling condition about 24 hrs after application.
When I say trowelling I mean flattening, smoothing and compacting. The window of opportunity for trowelling is quite wide, although there is a sweet point when it is perfect. If you try too early the plaster can form the occasional little bubble and it is very difficult to remove the trowel marks, trowelling too soon is best avoided but there are times when you need to do it, this is when I know that if I leave the trowelling overnight it will go too far and be almost too dry for the trowelling to be easy the following morning, in that situation I can carefully trowel the plaster smooth and then in the morning all I need do is go over again for the final compacting and smoothing.
Of course all this is so much easier when the plaster is flat, undulating plaster is such a chore and for that I find I have to use the really flexible, venetian plastering type trowel, but for all other plastering the trowels I use are rigid, that appears to be the Japanese tradition, rigid trowels for laying on, with practice you can get the plaster pretty flat without the need for floating, and even on this job, which was mainly skimming I used a very rigid Japanese Jigane trowel. ( http://japaneseplastering.blogspot.co.uk/p/blog-page_10.html)
Honyaki finishing trowel – the blade is quite rigid with only the slightest amount of flexing under pressure. It compacts and flattens to achieve a very hard wearing lime plaster surface.
My recipe for course stuff:
3 parts lime putty
1 part horse hair about 30mm long
6 parts sharp sand
method:
put the lime putty in a mixing tub such as a large trug, add the hair and stir it in so that the hair disperses. add half the sand mix with a plaster whisk then add the rest of the sand and mix again.
Some hair will get tangled on the whisk this needs to be taken off before it is used again.
I use a propellor whisk from Refina
 this grabs less hair than a basket whisk.
